Introduction:
Small and large companies alike could benefit from utilizing the shipping integrations within NetSuite ERP. Handling this process manually is not a cost-effective solution. Therefore, this post will discuss how to set up the innovative innate functionality provided by integrating with major shippers.
Overview:
There are three main shippers included in the integration: FedEx, USPS, and UPS. Accounts will need to be created with each of the shippers, which will later be needed to complete the integration. Accounts can always be added later as the business need arises.
Path:

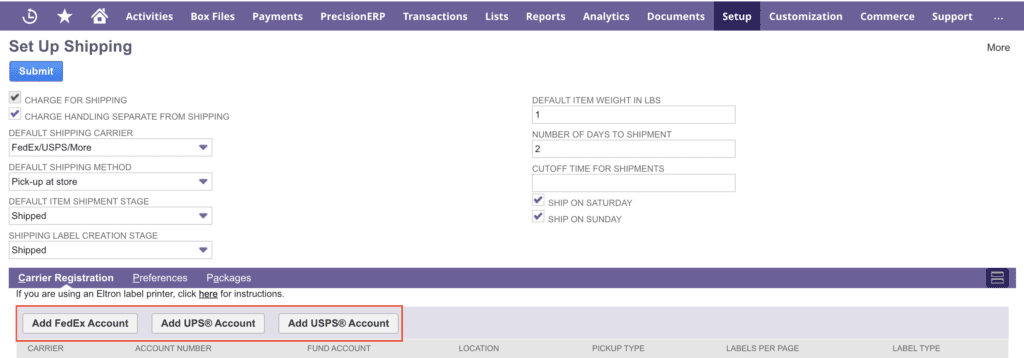
As an administrator or a user with the appropriate permissions, navigate to the path shown above. A clear set of guidelines and an end goal will streamline this process. Much information is embedded in the “Set-Up Shipping” form. This form will set the foundation of how the integration will perform. Users can choose to charge for shipping, handling, declare default shipping carriers, and much more.
Shipping Set Up Form:

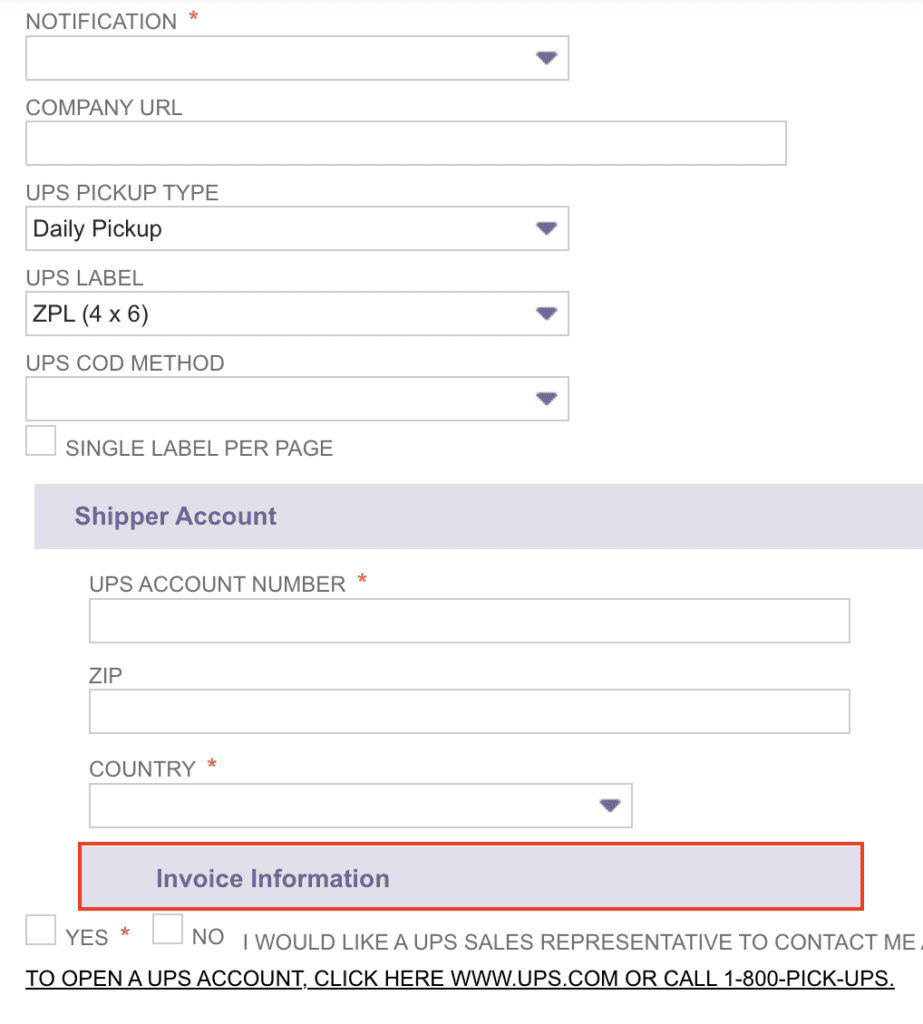
Under the Carrier Registration subtab, three buttons are listed as shown above. The button options will be used to add information about the user’s shipping account(s). The information needed will differ based on the shipper. This example will look at the “UPS Developer Kit Registration” form because the user interface can cause some confusion. Most of the fields included in this form are required and must be an exact copy of the account information. The easiest way to ensure success is to use the most recent invoice from UPS as anything but the most recent will end in failure. Towards the bottom of the form, there is a section titled Invoice Information. This title box must be clicked in order to expand the invoice fields. Using the invoice fields is highly recommended and has a strong track record of success when doing so.
Collapsed and Expanded Invoice Section:


The Preference tab allows users to add more customizable characteristics to the integration list. Selecting one of the four Rate options will subsequently impact the pricing downstream. The Packages tab allows for another time-saving automation option to expedite item fulfillment.
Preferences:

Packages:

Path:

Now navigate to the path listed above in order to create a new Shipping Item. For this example, UPS Ground using real-time rates will be configured. Enter the necessary information in the body of the form. Under the Shipping Rate subtab, select the bubble next to UPS Real-Time Rate. Make sure the box under the Shipping Label subtab is enabled, which allows for Shipping Label integration. Click Save and test the integration by filling out the information under the Shipping subtab when creating a Sales Order. By selecting the Shipping Carrier and the Shipping Method (Item), the shipping cost field will update with the real-time rate provided by UPS.
Shipping Rate:

Shipping Label:

Real-Time Rate Being Sourced from UPS:

Conclusion:
Setting up the shipping integration aligned to NetSuite ERP may seem like a large task, but it boils down to having a plan, understanding the business requirements, and altering processes when creating records. This implementation is well worth the time!
About Us
We are a NetSuite Solutions Provider and reseller with 30+ years of combined experience. We specialize in implementation, optimization, integration, rapid project recovery and rescue as well as custom development to meet any business need. If you would like more information on NetSuite or are in need of consultation for your project or implementation, feel free to contact us.
To Contact Us ClickHere

