Introduction
Managing vendor payments and ensuring compliance with tax regulations is a critical aspect of businesses’ financial operations. One of NetSuite’s unique features is the 1099 Saved Searches, designed to simplify the reporting of vendor payments for tax purposes. In this blog post, we will explore how to leverage NetSuite’s 1099 Saved Searches to report Vendor Payments efficiently.
Understanding 1099 Reporting
Before delving into the specifics of NetSuite’s 1099 Saved Searches, it is important to grasp the basics of 1099 reporting and the NetSuite customization guide. Form 1099 is used to report various types of income, including payments made to vendors or independent contractors. For businesses, accurate and timely 1099 reporting is crucial to comply with tax regulations.
Setting up Vendor Records
To effectively utilize NetSuite’s 1099 Saved Searches, start by ensuring that your vendor records are accurately configured. Each vendor record should have the appropriate 1099 Vendor box selected, indicating the type of payment made to the Vendor.
Making a Vendor 1099 Eligible:
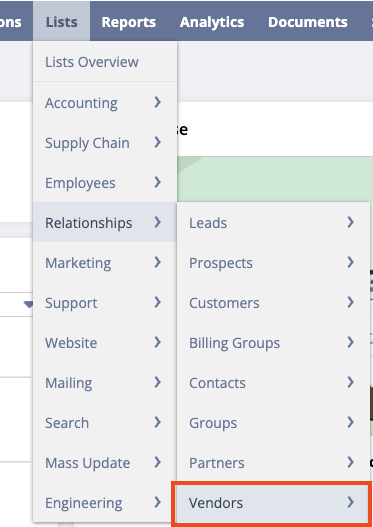
Go to Lists > Relationships > Vendors.
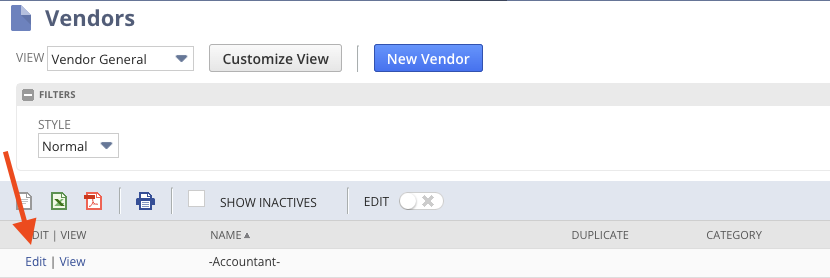
Click Edit next to the vendor that should be 1099 eligible.
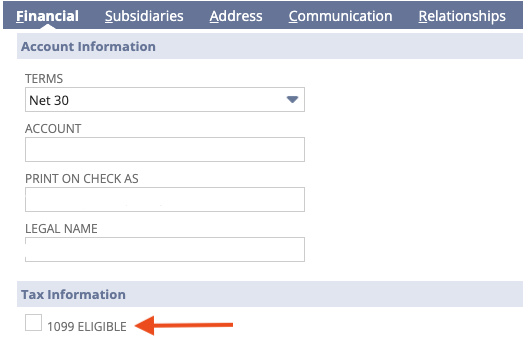
On the vendor record, click the financial subtab. Navigate to Tax Information and check the 1099 Eligible box.
Click Save.
Creating 1099 Saved Searches
Now that your vendor records are set up correctly, it’s time to create Saved Searches in NetSuite to streamline the reporting process.
Go to Customization > SuiteBundler > Search & Install Bundles.
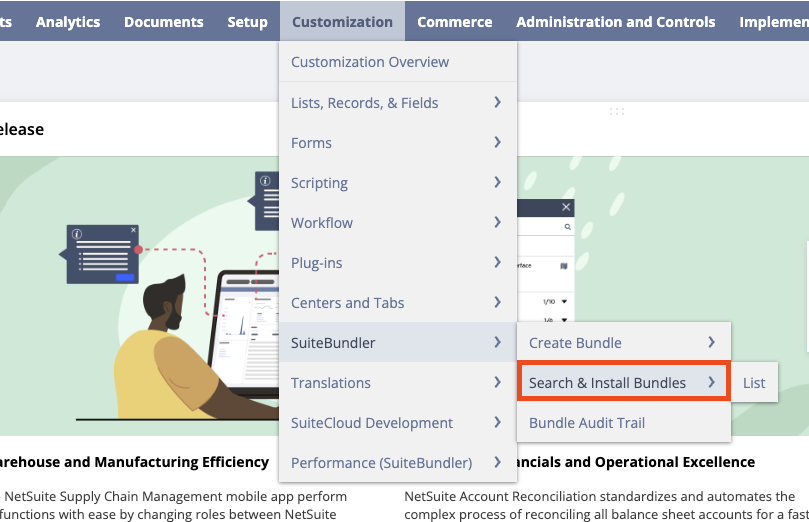
In the Keywords field, enter 1099 Vendor Payment Report.

Click on the name of the bundle.
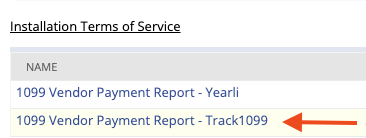
Then, click the Install button.

After the Saved Search is installed, go to Reports > Saved Searches > 1099 Vendor Payment Report – Vendor Name > Edit.
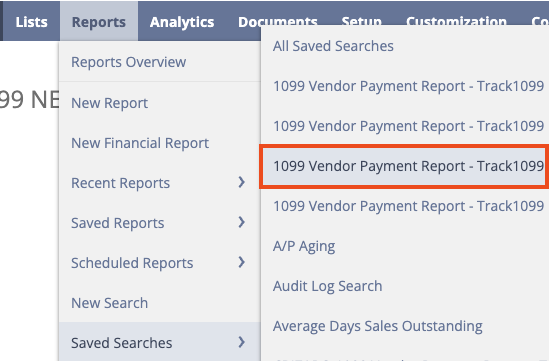
Edit the search according to your needs.
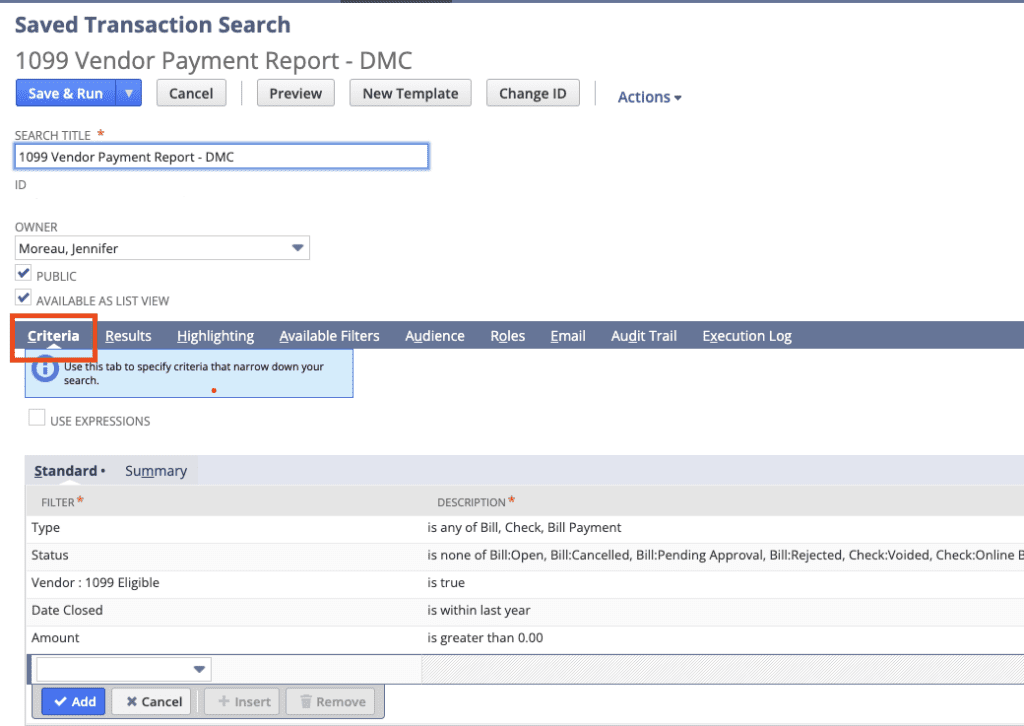
It is important to note that the Standard Saved Search generated by NetSuite may not include the necessary Criteria or Results to achieve the desired outcome. It is imperative to include required fields using Case When formulas and eliminate unnecessary information for optimal results.
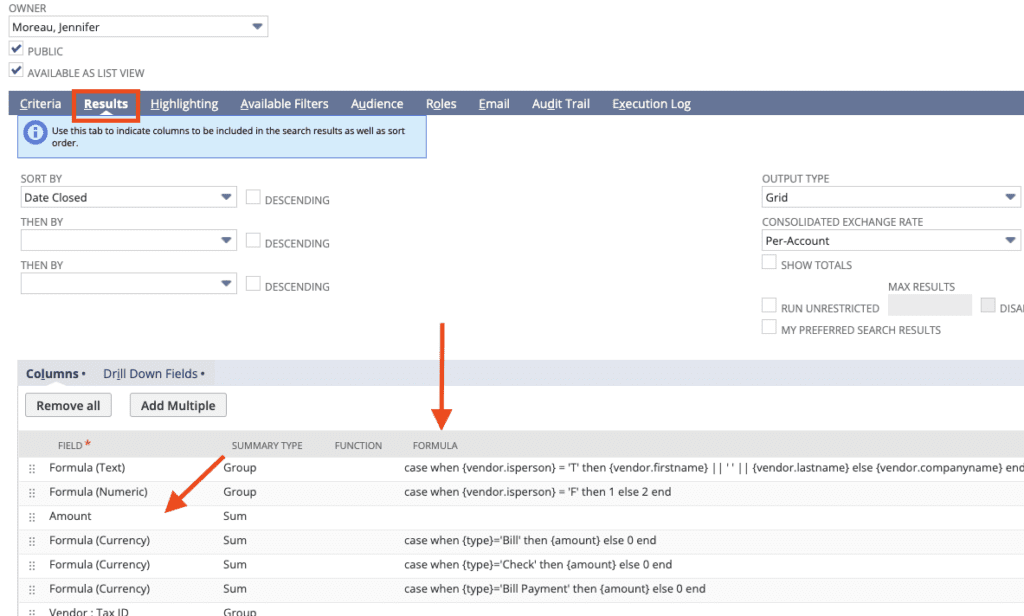
After desired results have been previewed, export the search to a CSV or Excel file.

Conclusion
NetSuite’s 1099 Saved Searches offer a robust toolkit for businesses aiming to simplify vendor payment reporting. By configuring and tailoring these searches to align with your particular requirements, you can improve efficiency, precision, and adherence to regulatory standards in your financial processes. Proficiency in utilizing this functionality guarantees that your business remains well-prepared for 1099 reporting obligations, promoting a seamless tax season and effective overall NetSuite financial management.
About Us
We are a NetSuite Solutions Partner and reseller with 30+ years of combined experience. We specialize in implementation, optimization, integration, rapid NetSuite project recovery and rescue, and custom development to meet any business need. If you would like more information on NetSuite or need consultation for your project or implementation, feel free to contact the professional NetSuite Solutions Providers.
To Contact Us, ClickHere


