


Introduction:
While subtabs within NetSuite Tools already contain an immense amount of versatility and options for data input, you may find that the standard options provided by your purchased modules simply cannot achieve what you need. Creating a customized subtab with either already available data or creating customized data to further tailor your subtab will certainly achieve your end goal.
Overview:
First, as a user with the appropriate permission set to create a subtab, click on the Customization tab. Then, hover over Forms and select Subtabs–this will bring you to the custom subtab form where you will need to fill out the appropriate data. As you will see in the image below, you must choose between Transaction, Entity, Item, or NetSuite CRM. Select Entity with the end goal of having the subtab apply to a customer record. After selecting Entity, fill out the name for the subtab and click Save. Once saved, the subtab will be created but cannot instantly be added to the customer entity. Instead, there must be a field associated with the subtab to allow its addition to the subtab list. If you need a NetSuite customization guide, then visit our website.
Path: Subtabs
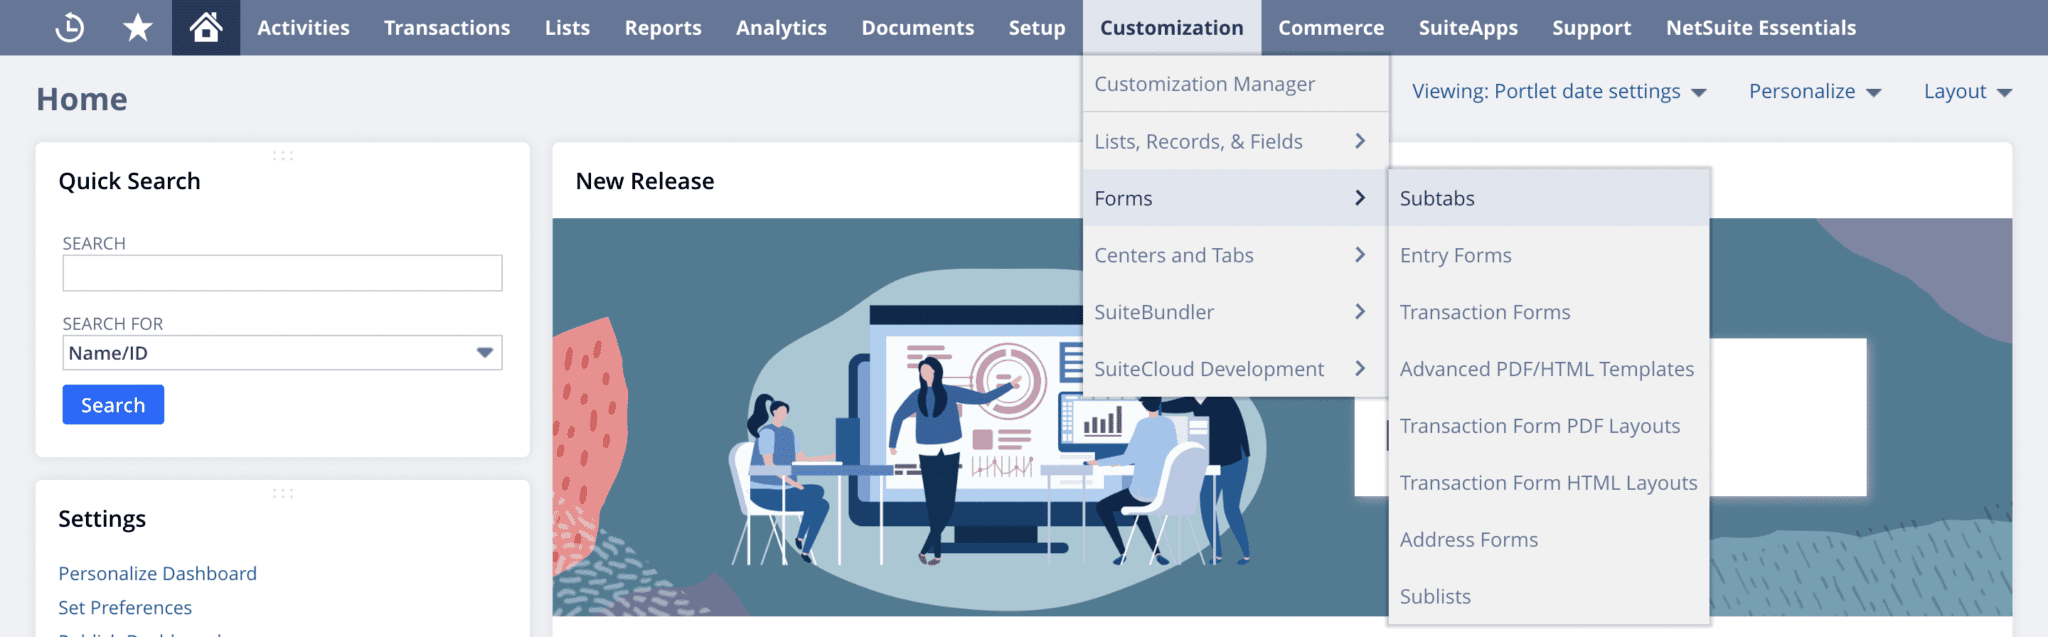
Form: Custom Subtabs

Second, you will once again navigate to the Customization tab. Hover over Lists, Records, & Fields, then click New next to Lists: this is where you will create the content that populates the custom list. It will start with the name of the list and a description of its contents. Then, under the Values tab, type and add the values you would like, one at a time. When you have completed your list, click Save.
Path: Lists

Form: Custom List Form

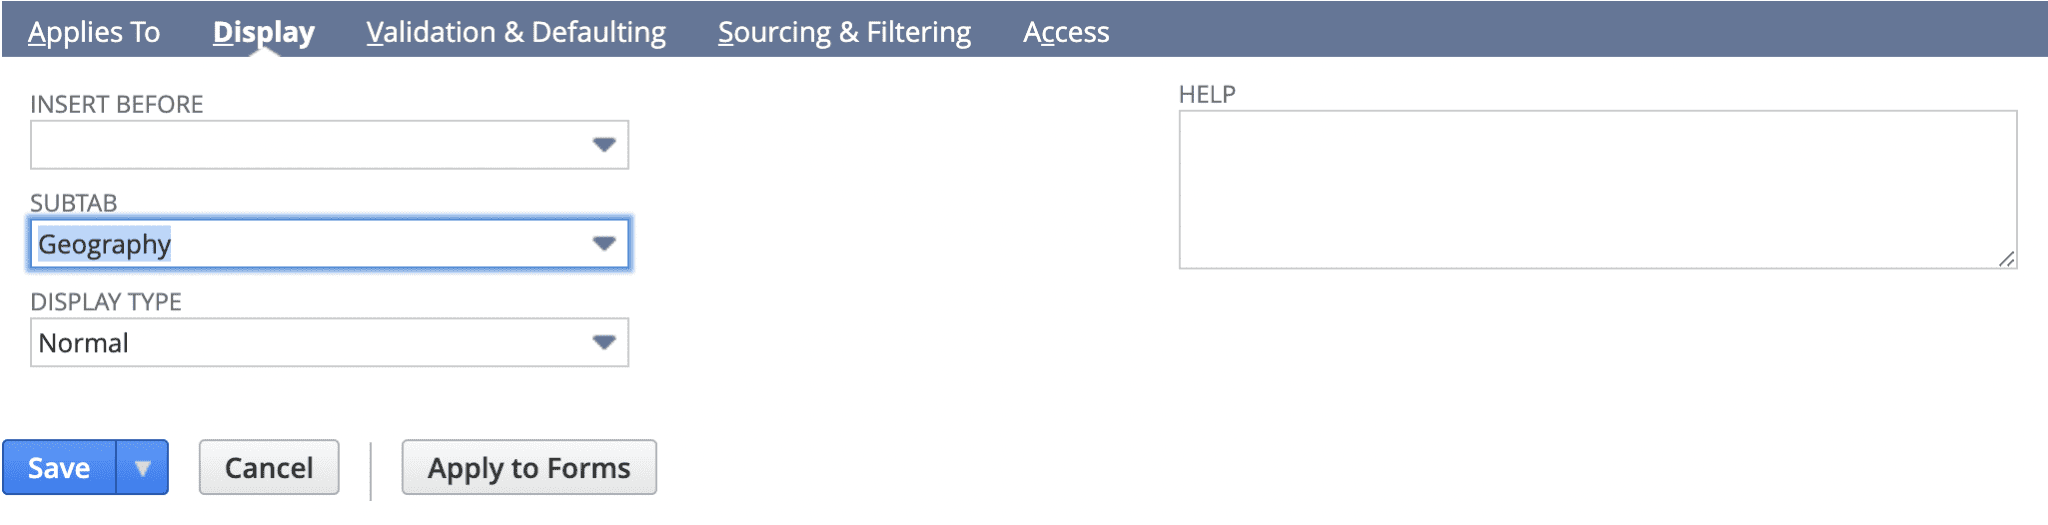
Next, you will create a custom field and assign your custom list. Navigate to the Customization tab and hover over Lists, Records, & Fields again but this time, click New next to Entity Fields–this step takes you to the custom entity field form where you fill out the name of the field. Then, select the type of field from the drop-down menu of available options. By selecting List/Record as the type of field, you now have access to the field below titled List/Record, where you select the custom list created in the previous step. Under the subtab titled, Applies To, select Customer as the entity type. On the next subtab titled Display, select the name of the subtab created in step one using the drop-down menu within the field Subtab.
Path: Entity Field Path

Form: Custom Entity Field

Display Subtab on Form:
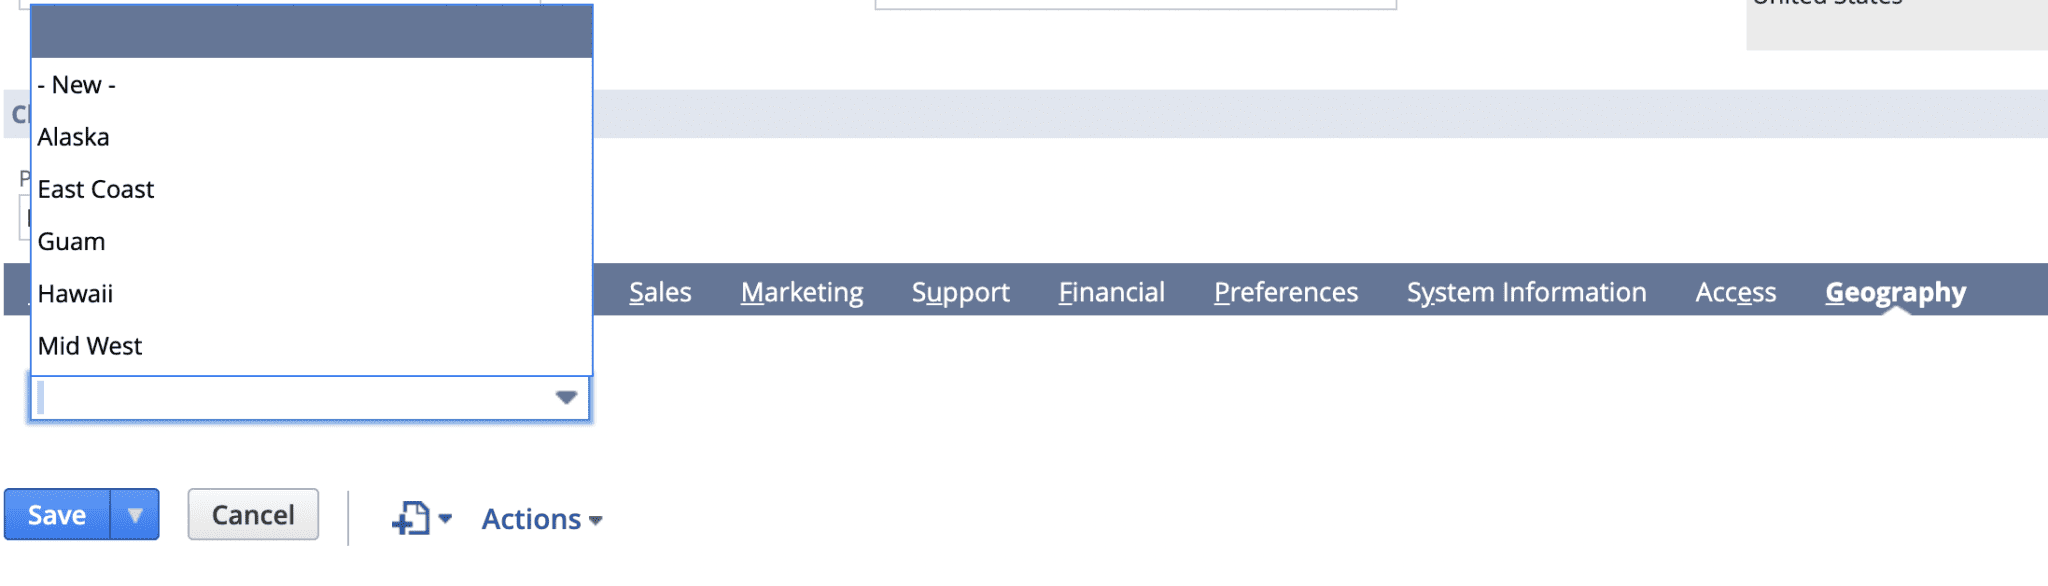
Finally, navigate to a customer record and view the changes. When first viewing the record, the custom subtab will appear on the far right of preexisting subtabs. However, there is currently no customer data associated with the subtab. You will need to edit the customer record and populate the subtab with a selection from the custom list created and click Save. The customer record will now reflect the information added to the subtab.
Subtab on Customer Record Before Saving:
Subtab on Customer Record After Saving:

Conclusion:
Subtabs can be a valuable tool for harnessing the power of NetSuite. If the standard options don’t handle your unique business needs, NetSuite allows for easy customization and manipulation to tailor data to fit your needs.
About Us
We are a NetSuite Solutions Partner and reseller with 30+ years of combined experience. We specialize in implementation, optimization, integration, rapid project recovery and rescue as well as custom development to meet any business need. If you would like more information on NetSuite or are in need of consultation for your project or implementation, feel free to contact our NetSuite support.
To Contact Us ClickHere