Introduction
Effective workforce management requires careful handling of employee time off requests. NetSuite, a top-tier cloud-based ERP system, simplifies the process by allowing employees to easily submit time off requests and managers to review and approve them efficiently. With features like the NetSuite employee center and NetSuite online forms, the platform enhances productivity and communication. This blog will walk you through the steps to submit and view time off requests in NetSuite, ensuring a seamless and efficient experience for both employees and managers.
Submitting Time Off Requests
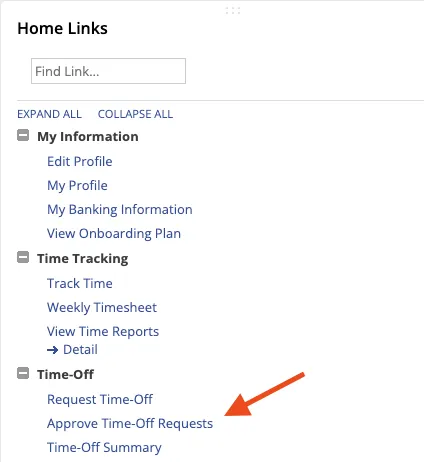
From the home page of your Employee Center, navigate to the Time-Off portlet and click on “Requests.”
To view additional time-off requests, select “View All Requests” within the portlet.

On the Time-Off Request page, you can see the current status of each request, the submitter, the date range, and the types of time-off used.
Once logged in, navigate to the Time Off Request page. This can typically be found under the “Employee Center” or a similar section in your NetSuite dashboard. Look for options such as “Time Off,” “Leave Request,” or “PTO Request.”
Fill Out the Time Off Request Form
You will find a form to fill out on the Time Off Request page. This form will require details such as:
Type of Time Off: Select the type of leave you request (e.g., vacation, sick leave, personal leave).
Start Date: Enter the date when your time off will begin.
End Date: Enter the date when your time off will end.
Reason: Provide a brief explanation for your time off request. This is optional but can be helpful for your manager.
Submit the Request: Review the details to ensure accuracy after filling out the form. Once confirmed, submit the request. You may receive a confirmation message indicating that your request has been successfully submitted.
Viewing Time Off Requests
For Employees
As an employee, you may want to view the status of your time off requests to stay informed about their approval process.
Access Your Time Off Requests
Log in to NetSuite and navigate to the section where you can view your submitted time off requests. This is usually under the “Employee Center” or a similar section.
Review the Status
Here, you will see a list of your submitted time off requests along with their current status (e.g., pending, approved, denied). You can click on each request for more details, including any comments or feedback from your manager.
For Managers
Managers are responsible for reviewing, approving or denying time-off requests submitted by their team members.
Access Pending Time Off Requests
Log in to NetSuite and navigate to the section where you can view pending time off requests. This is often found under “Manager Center” or a similar section in your dashboard.
Review Requests
You will see a list of pending time off requests. Click on each request to view the details, including the type of leave, dates, and reason provided by the employee.
Approve or Deny Requests
After reviewing the request, you can choose to approve or deny it. Provide any necessary comments or feedback, and then submit your decision. The employee will be notified of your decision through NetSuite.
How to Create a Deduction Type in NetSuite for Employee Expenses:
Navigate to the Payroll Item List.
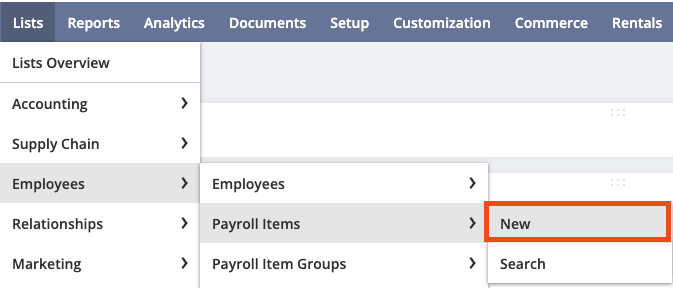
Go to Lists > Employees > Payroll Items > New.

Create a New Deduction Item:
In the Payroll Item Type field, select Deduction.

Define the Deduction Details:
In the Name field, enter a name for the deduction, such as “Preferred Seating Deduction.”
Fill in the Account Category
Fill out other required fields like Description (Allocates and deducts costs linked to premium seating options, ensuring expenses for enhanced seating experiences are accurately offset by additional revenue) and Liability Account. Select an appropriate Liability Account to track this deduction based on other Deduction Pay Role types or utilize SuiteAnswers Payroll suggestions – 8607

Specify the Pay Code Settings based on previous business rules or utilize SuiteAnswers Payroll Code suggestions – 8607.
Click Save to create the new deduction type.
Assign the Deduction to Employees:
Go to Lists > Employees > Employees.

Select the employee you want to assign this deduction to.
Under the Payroll tab, click on the Deductions subtab.

Click New Deduction and select the newly created deduction item.
Enter any specific rates or limits if they differ from the defaults.

Process Payroll:
When running payroll, ensure the deduction is applied correctly to the employees’ paychecks.
Tips for Effective Time Off Management
Communicate Clearly: Ensure that employees understand the process for submitting time off requests and the expected turnaround time for approval.
Plan Ahead: Encourage employees to submit time off requests well in advance, especially for longer leaves, to allow for proper planning and coverage.
Monitor Balances: Regularly monitor leave balances to ensure that employees have sufficient leave available for their requested time off.
Document Policies: Clearly document your company’s time off policies in NetSuite so that employees and managers can easily reference them when needed.
Conclusion
Effectively managing time-off requests is essential for maintaining an organized and productive workforce. Within NetSuite, handling these requests efficiently hinges on understanding and leveraging deduction types. These not only help the system categorize the type of leave an employee is taking but also ensure accurate calculations and compliance with company policies. By following the steps outlined above, employers can streamline the process, reduce errors, and create a seamless experience for both management and employees, fostering a well-balanced and efficient work environment.
About Us
We areNetSuite Solutions Providerswith 30+ years of combined experience. We specialize in NetSuite consulting, implementation, optimization, integration, rapid project recovery and rescue, and custom development to meet any business need. Although every business is unique, with 40+ NetSuite clients over the last 5+ years, our NetSuite Consultants have most likely seen your challenge or created a similar solution. If you would like more information on NetSuite EDI partners or just have questions about your project, feel free to contact us Here.

