


INTRODUCTION
NetSuite is a powerful and versatile cloud-based enterprise resource planning (ERP) software that helps businesses manage various aspects of their operations. One of its key features is the ability to create customizable dashboards that provide real-time insights into your company’s data and performance. In this blog post, we will walk you through the steps to customize your dashboard in NetSuite to meet your specific needs.
Step 1: Accessing the Dashboard
To begin customizing your dashboard in NetSuite, you must first log in to your NetSuite account. Once logged in, navigate to the dashboard by clicking on the “Home” tab located on the top menu bar.
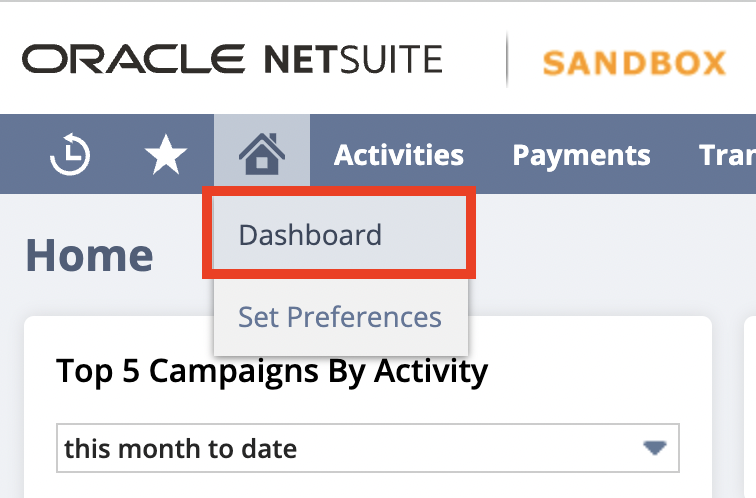
Next, navigate to Personalize.

Step 2: Add and Customize Portlets
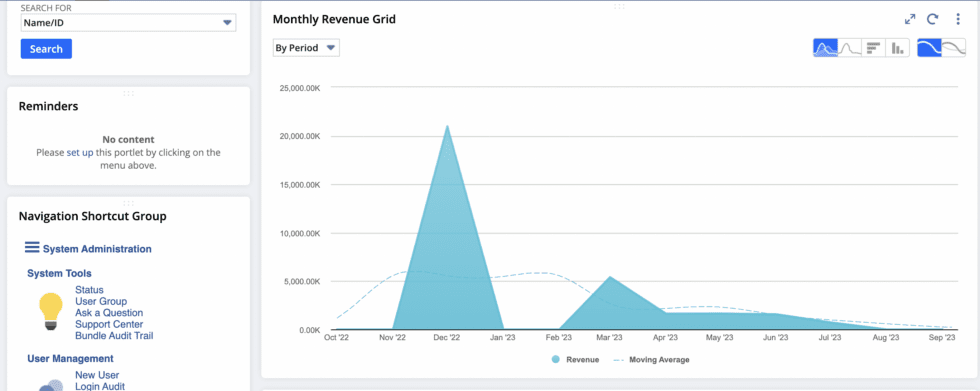
Portlets are the building blocks of your dashboard. They are widgets that display various types of information, such as charts, reports, or KPIs. To add a portlet to your dashboard, hover over the tile and click. NetSuite offers a wide range of pre-built portlets, but you can also create custom ones to display data specific to your business processes.
Below are some examples of ways you can customize your dashboard:
Comparative KPI Revenue/Grid by Month – Configure standard NetSuite KPI matrix using KPI Indicator tile.
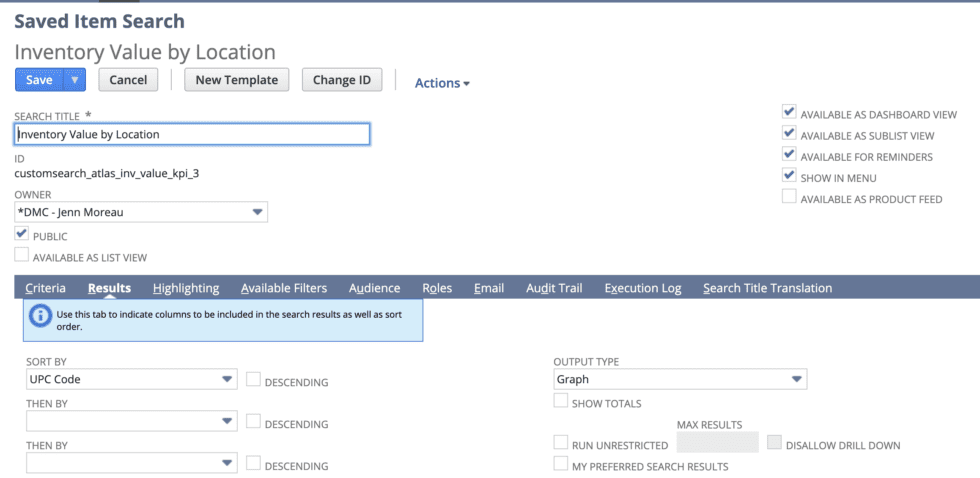
Inventory Value Configured by Warehouse – Build a Saved Search and link it through the Quick Search tile.


Links to basic statements. Ex: Income Statements, Cash Flow, Balance Statements, Open Sales Orders. This is Standard NetSuite where you can link a list through the Shortcuts tile.
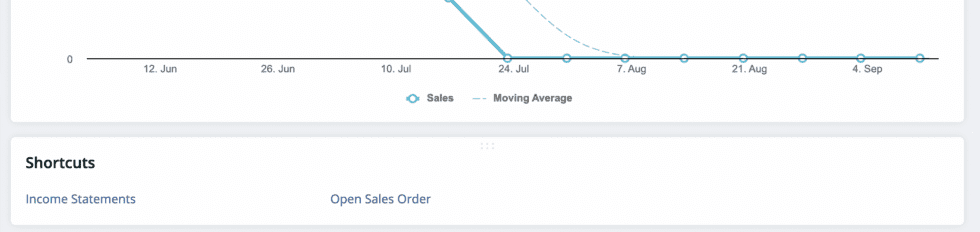
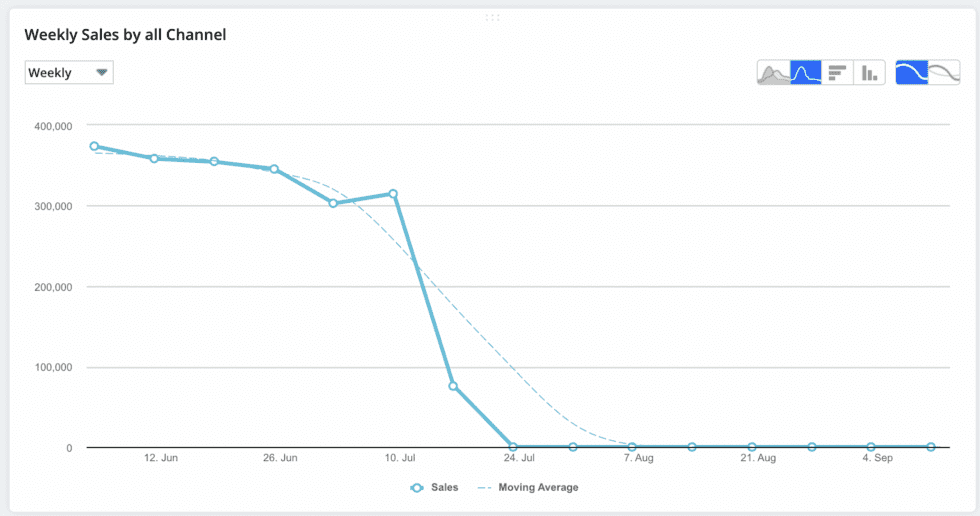
Daily/Weekly Sales by all channels – Use the Trend Graph tile.
Layout – To organize your dashboard effectively, you can drag and drop portlets to rearrange them. This allows you to prioritize the most important information and create a visually appealing layout.
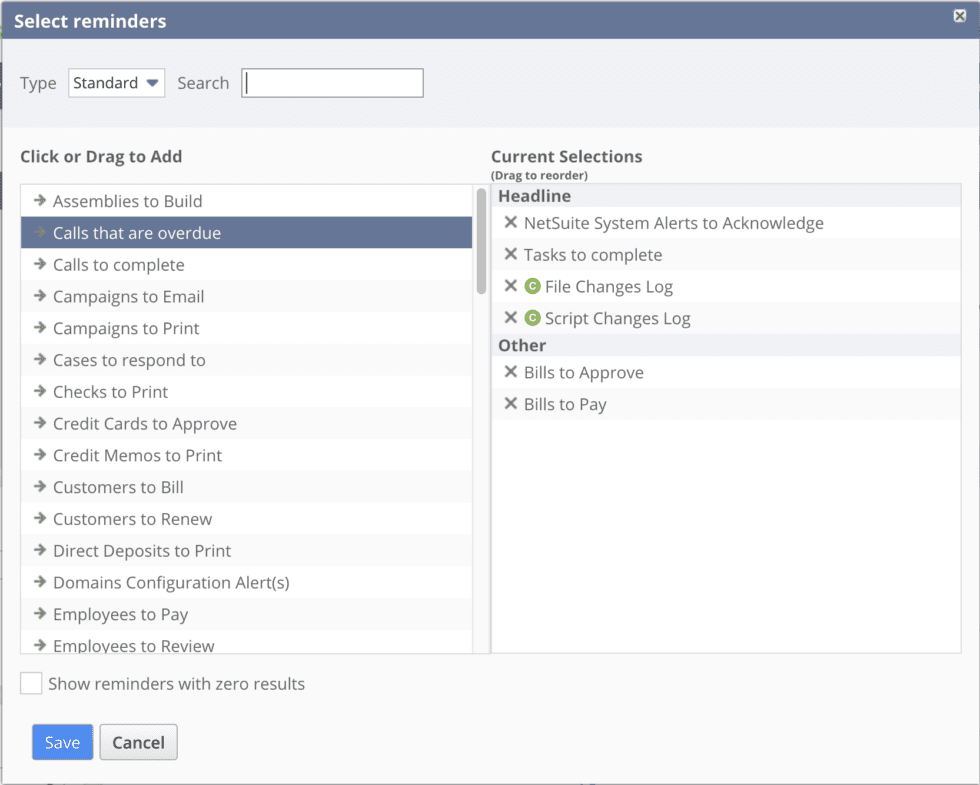
Reminders – Tiles can be added using the Personalize section.
Alerts – Go to Home > Set Preferences. Click the Alerts subtab. Choose the time of day you want to receive your email alerts. Check the Include Links in the HTML Alerts box to enable you to click links in email alerts and open your account to the relevant information. For Saved Searches, go to Reports > Saved Searches > All Saved Search. Mark under the Email subtab, check the box: Allow Users to Subscribe.

Step 3: Review and Refine
Customizing your dashboard is an ongoing process. Regularly review your dashboard’s performance and relevance to ensure that it continues to provide valuable insights. You can make adjustments, add new portlets, or remove outdated ones as needed. If you need any further assistance in these steps, please feel free to connect with NetSuite experts, they will be happy to help you in every way possible.
CONCLUSION
Customizing your dashboard in NetSuite is a powerful way to tailor your ERP experience to your organization’s unique needs. By following the steps outlined in this guide, you can create a dashboard that provides real-time insights, enhances productivity, and supports informed decision-making. Remember that customization is an ongoing process, and it’s essential to adapt your dashboard as your business evolves and your data requirements change. With a well-customized NetSuite dashboard, you can streamline operations and gain a competitive edge in your industry.
About Us
We are a NetSuite Solutions Partner and reseller with 30+ years of combined experience. We specialize in implementation, optimization, integration, rapid project recovery and rescue as well as custom development to meet any business need. If you would like more information on NetSuite or are in need of consultation for your project or implementation, feel free to contact NetSuite support.
To Contact Us ClickHere