OVERVIEW
Hi all,
In this blog post we are going to walk through the process of approving a Journal Entry.
To review from our Part 1 blog of this series, a general journal entry records debits and credits to be posted to ledger accounts. General journal entries adjust the value of any set of accounts without entering transactions such as invoices or bills.
For example, journal entries can be used to do the following:
- Specify the opening balances for your accounts if you chose not to do it when you first created your NetSuite account for your company.
- Edit your opening balances if you find the amounts were in error.
- Enter an adjustment such as for depreciation, that is not possible as a standard transaction.
- Transfer amounts from one ledger account to another.
- Consolidate multiple subsidiary accounts into a single account for the purposes of consolidated reporting.
Note:
Journal entry transactions are not posted until they are approved. A netsuite journal entry approval workflow is posted during the period to which the journal entry approver has access. Until a journal entry is approved, NetSuite tentatively displays the posting period based on the transaction date. If the period is locked or closed, the posting period is determined by the accounting preference Default Posting Period When Transaction Date in Closed Period.
PROCESS
To Approve a Journal Entry in NetSuite:
1. Go to Transactions > Financial > Approve Journal Entries.

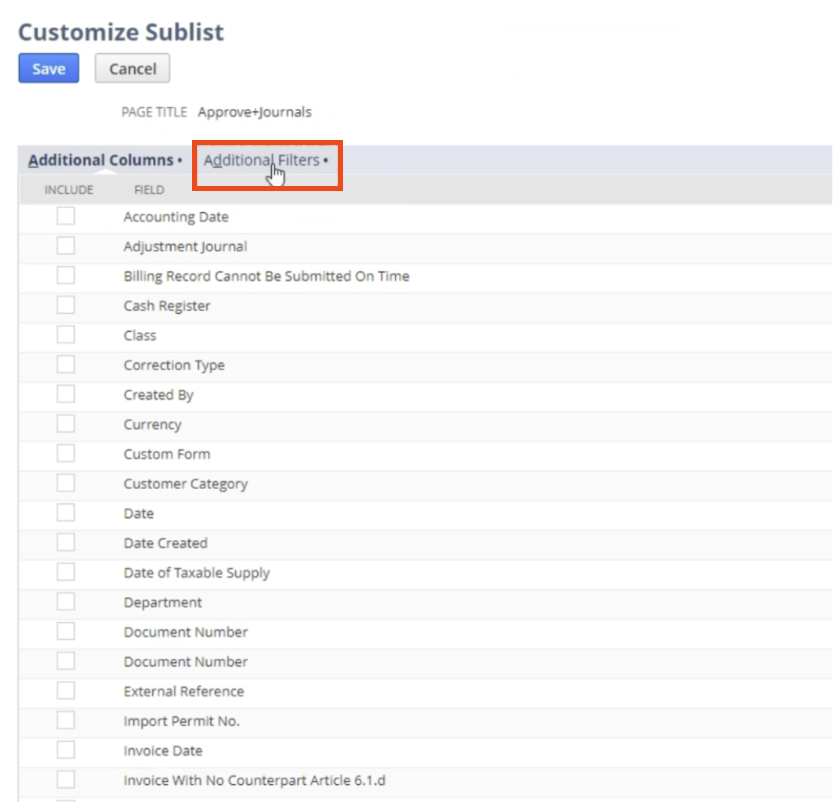
2. Optionally, click Customize View to filter the journals awaiting approval or to select the columns to display on the Approve Journals page. On the Customize Sub list page:
- Click the Additional Columns sub-tab and check each field you want to add as a column. For example, if you use OneWorld, you can add a Subsidiary column.
- Click the Additional Filters sub-tab and check each field for which you want to allow filtering. For each checked field, a filter list is added on the Approve Journals page. For example, you can add a Created By filter.

- Click Save to return to the Approve Journals page.
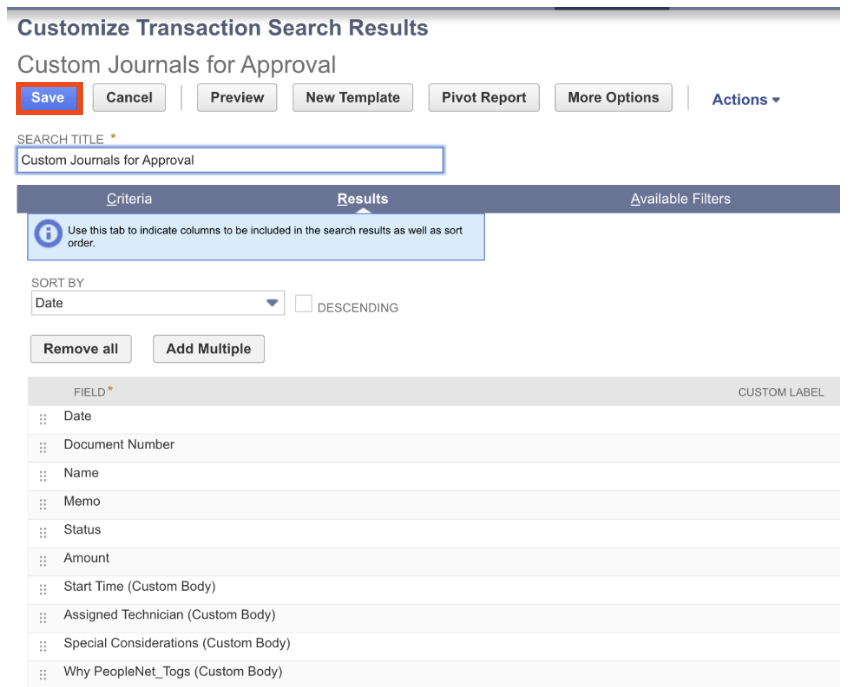
3. If you have added any filters, select from lists to limit the listed entries.
4. Check the boxes in the Approve column next to the entries you want to approve.
5. Click Mark All to approve all the journal entries.
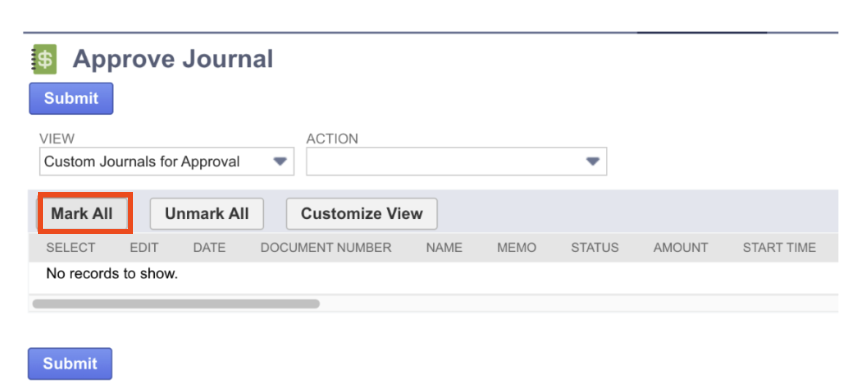
6. If you are using a custom workflow for journal entry approval routing, two lists appear at the top of the page: Action and View. The Action list enables you to approve or reject journal entries. The View list enables you to filter the journal entries by their status. Depending on the configuration of your approval routing workflow, various buttons that perform workflow steps may appear.
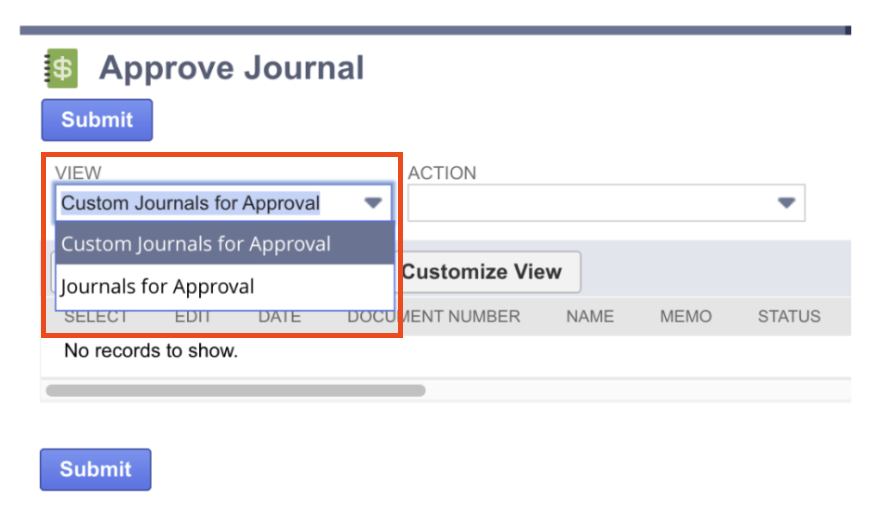
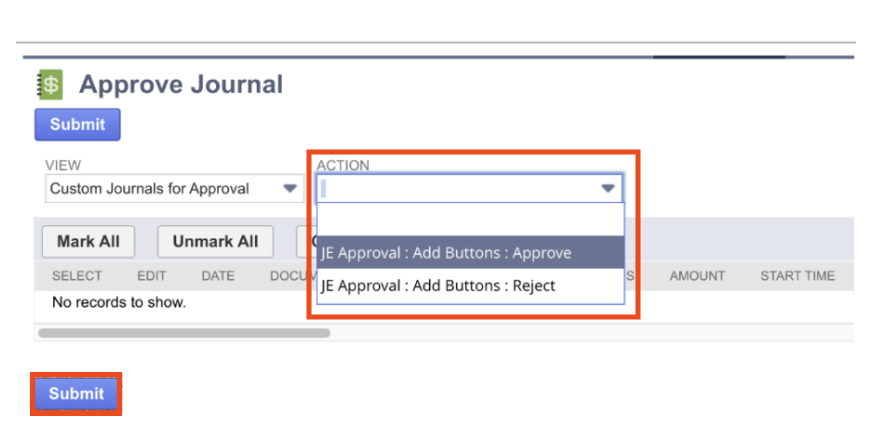
7. Click Submit.
Note:
If you use NetSuite OneWorld, the Approve Journals page lists only journal entries for subsidiaries to which you have access to.
CONCLUSION
Since journal entry is one of the most impactful processes on the outcome of an organization’s financial reporting, it is important to have a standardized workflow and approval process. We have shown you a simplistic way of approving, but there are many ways to customize this course of action. Standardizing the way financial processes are completed, not only in the journal entry process and approval but also in all parts of the Record to Report (R2R), will help finance and NetSuite accounting teams drive efficiency while staying accurate and compliant across all entities.
About Us
We are a NetSuite Solutions Partner and reseller with 30+ years of combined experience. We specialize in implementation, NetSuite Optimization, integration, rapid project recovery and rescue, and custom development to meet any business need. If you would like more information on NetSuite or need consultation for your project or implementation, feel free to contact us.
To Contact Us ClickHere


