


INTRODUCTION
A contract is no longer a one-time deal in most business transactions. Instead, it is usually broken down into monthly or quarterly payments. This is especially important for IT services and software as it can be hard to track the payments of clients due to the varying schedules. Having a system that can identify who and what needs to be paid each month automatically is important to ensure that the company is not missing any compensation.
With the help of software such as NetSuite, it can be easier for companies to set up recurring bills and manage their payables. This article will discuss the steps in creating and applying a billing schedule. Prior to going into more detail about the billing schedule process, it is crucial to understand what it is.
What is a Billing Schedule?
A billing schedule in NetSuite is an essential part of an organization’s operations. It shows recurring revenue that should be generated for an order or line of business. It allows the creation of invoices and the management of these documents. Follow the process below in NetSuite tool to learn how to create a Standard Billing Schedule and Assign a default Billing Schedule to an item.
PROCESS
Navigate to Lists > Accounting> Billing Schedules > New.

This is going to open the Billing Schedule page. Start by specifying the Type of billing schedule you want to use. Click on the drop-down to see your list of choices.
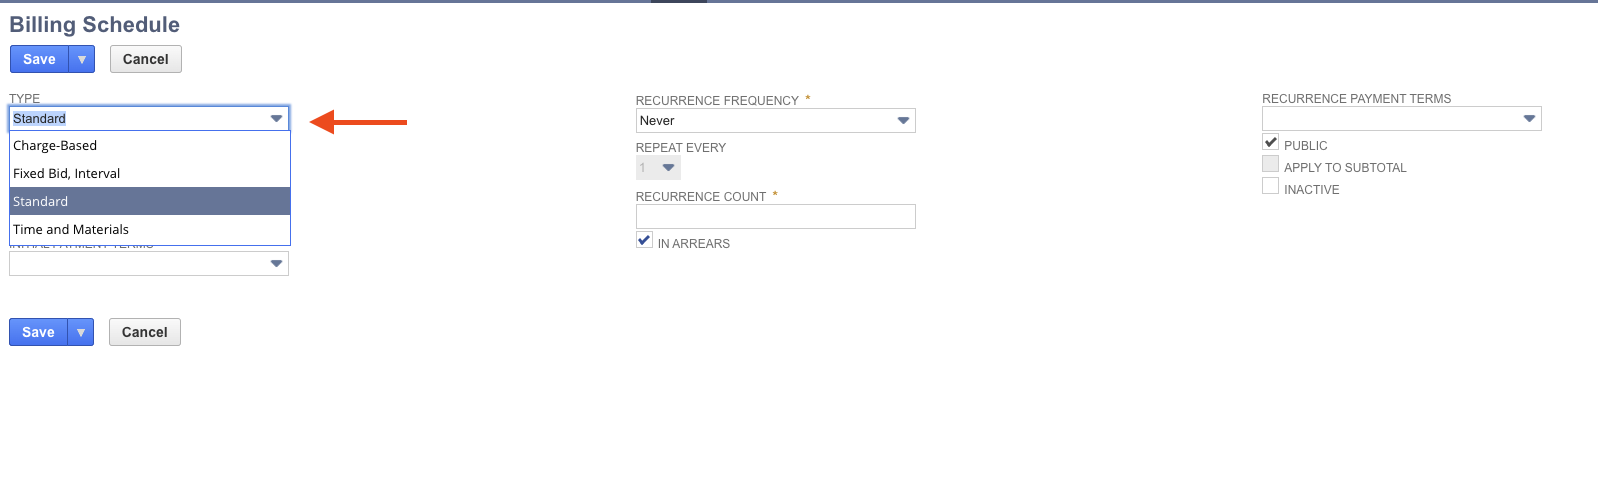
Set the Schedule Details:
- Type
- Name
- Initial Amount and Payment Terms
- Recurrence Frequency and Count. Optionally, set the Payment Terms
- Check the Public box to make available
Click Save.
Note: In Arrears
- Checked: Billed at the end of each period
- Unchecked: Billed at the beginning of each period.
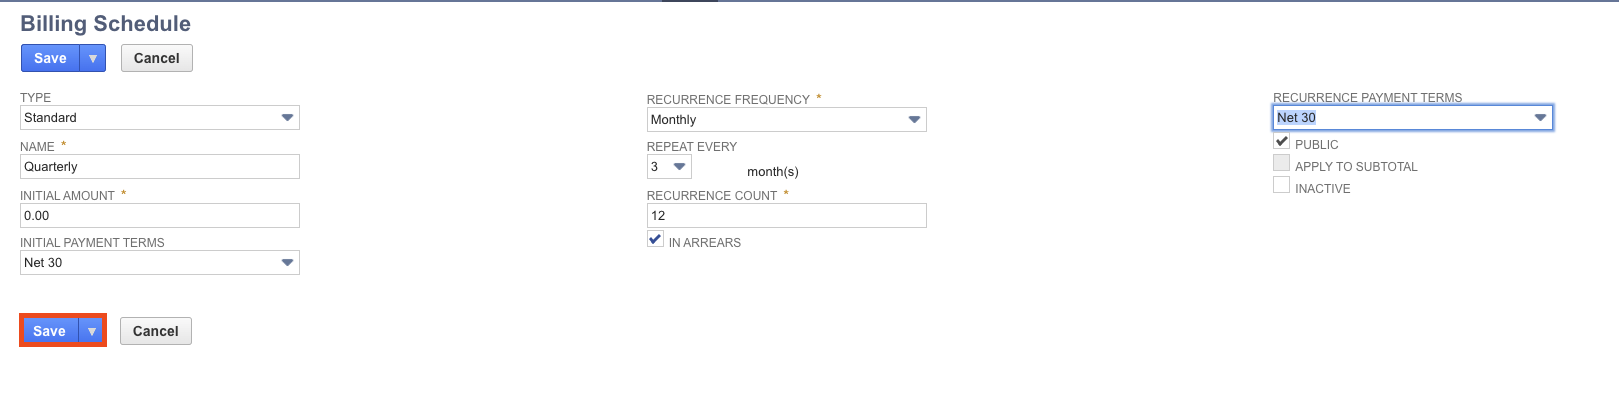
Examples of Standard Billing Schedules

Customized Billing Schedules
NetSuite has an Advanced Billing feature that enables you to create billing schedules you can apply to sales orders or to line items on sales orders. When you apply a billing schedule to an order, the order is billed according to that schedule. You can create customized billing schedules as required to automate the creation of invoices based on the related license agreement and/or service contract to meet your customers’ exact needs. Below is the first and easiest way to assign a Billing schedule.
Assigning a Default Billing Schedule to an Item
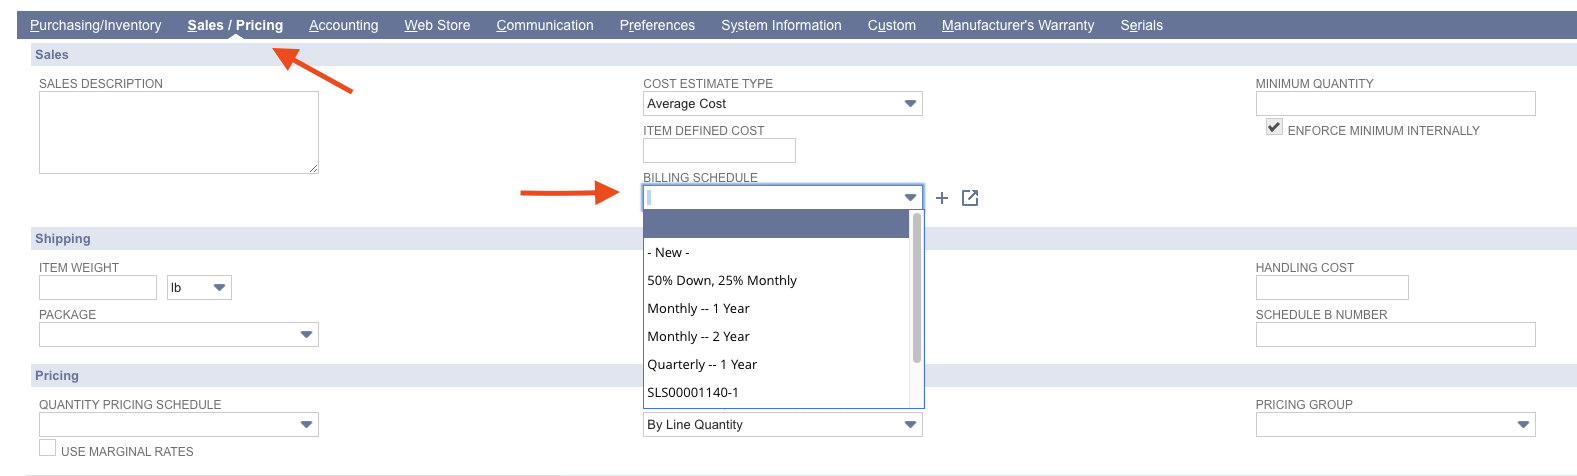
You can assign a billing schedule on an item record. Then, when the item is chosen on sales transactions, the billing schedule is applied by default. Default billing schedules can be changed on individual transactions.
Go to Lists > Accounting > Items > New > New.

Click the item type you want to create.
On the item record, enter information in the necessary fields.

On the Sales / Pricing subtab under Sales in the Billing Schedule field, select the billing schedule you want to associate with this item.
Click Save.
If you need any further information on this topic, feel free to connect with NetSuite experts, they will be happy to help you in every way possible.
CONCLUSION
To recap, a NetSuite billing schedule is an essential record that enables an order line or individual to generate recurring invoices. It can be used to date invoices that have been made from sales orders and ensure that they are filled according to the terms of the service contract. As you can see, this functionality helps you seamlessly send periodic invoices to customers.
About Us
We are a NetSuite Solutions Partner and reseller with 30+ years of combined experience. We specialize in implementation, optimization, integration, rapid project recovery and rescue as well as custom development to meet any business need. If you would like more information on NetSuite or are in need of consultation for your project or implementation, feel free to contact NetSuite support.
To Contact Us ClickHere