


Introduction:
In NetSuite, users can configure a Bank Import Format Profile to define how a bank’s electronic transaction data should be processed and imported into a NetSuite account. These profiles help automate the reconciliation process and will surely save time once configured.
Overview:
This post will walk through the steps needed to configure a Bank Import Format Profile. This can be done with more automation by connecting directly to a specific bank or it can be configured manually. This post will primarily focus on the manual approach.
Process:
1. Log in to NetSuite:
Log into NetSuite using an administrator or a user with the necessary permissions.
2. Navigate to the Bank Import Format Page:
From the NetSuite dashboard, go to Setup > Accounting > Financial Institutions > List

Then select the Institution that needs a Profile configured.
3. Create a New Profile:
Click the ADDbutton to create a new Bank Import Format Profile.
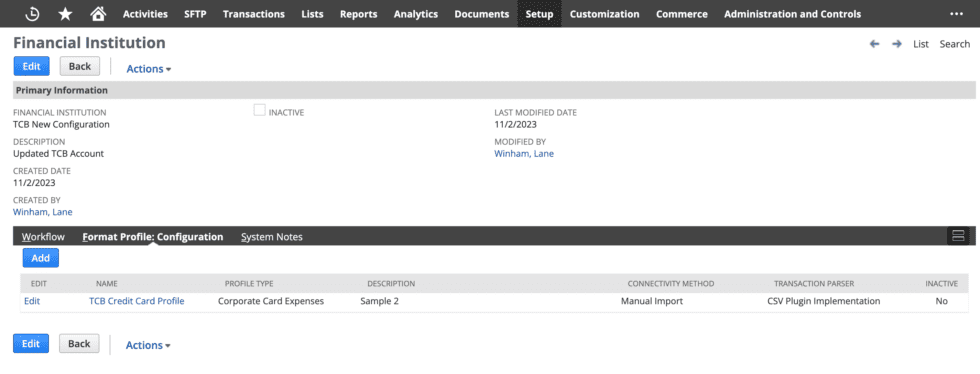
4. Profile Information:
Fill in the profile information:
Profile Name: Generally, when naming, using specific clear language is best.
Profile Type: Once saved this cannot be changed.
Connectivity Method: Manual Import
Transaction Parser: CSV
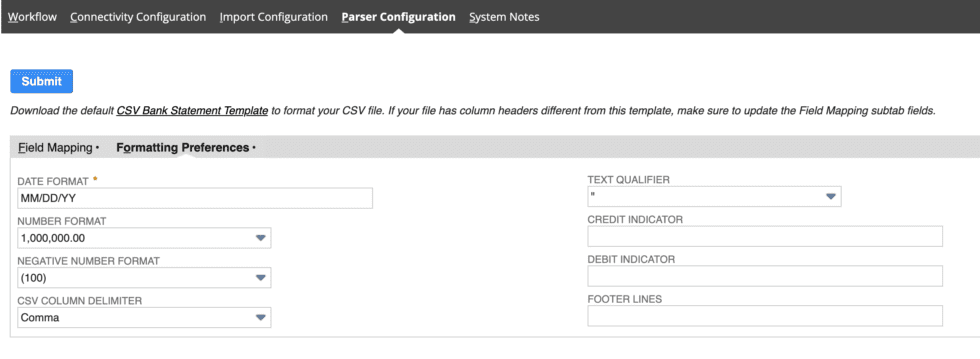
5. CSV or Other File Format Settings:
Configure the settings for the format of the bank data file that will be imported. This will depend on the specific format of the files provided by your bank and will likely vary for each bank.
Other actions might include specifying delimiters, enclosures, date formats, and other file format settings based on the bank’s file format.
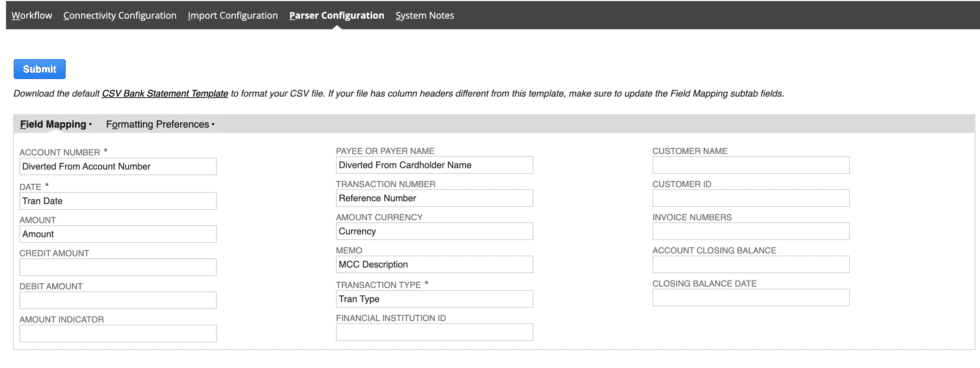
6. Column Mapping:
Map the columns in the bank’s data file to the corresponding fields in NetSuite. This step defines how NetSuite should interpret the data in your bank file.
Map columns to fields like Date, Amount, Description, and more.
7. Default Values:
Define default values for fields that may not be present in the bank file but are required in NetSuite.
8. Post Process Script:
If needed, a post-process script can be added in SuiteScript to perform additional custom processing after the import.
9. Testing and Validation:
Before finalizing the configuration, it’s a good practice to test your Bank Import Format Profile using sample bank files to ensure that the mappings and settings are correct. If available, this testing would take place in the Sandbox environment.

10. Save:
Once satisfied with the configuration, click the Save button to save the profile.
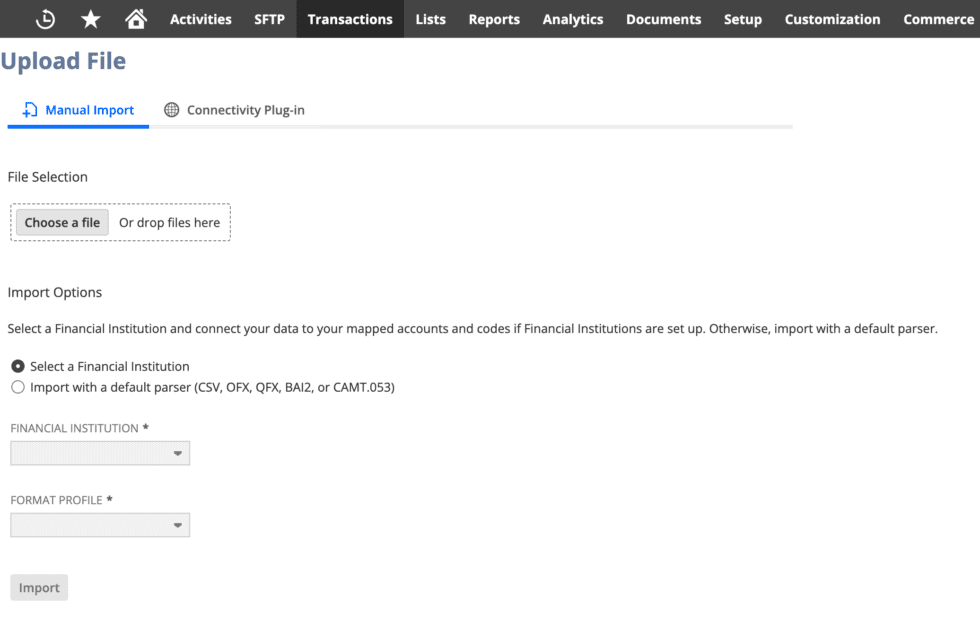
11. Usage and Reconciliation:
After saving and activating the profile, it can be used during the bank reconciliation process to import and reconcile bank transactions with NetSuite records.
If you need further information about these processes, then connect with NetSuite experts, they will be happy to help you in every way possible.
Conclusion:
Configuring a Bank Import Format Profile in NetSuite helps streamline the process of importing bank transaction data, making it easier to reconcile bank accounts and maintain accurate financial records. Take special care to ensure the configuration aligns with the specific bank’s data format and requirements.
About Us
We are a NetSuite Solutions Partner and reseller with 30+ years of combined experience. We specialize in implementation, optimization, integration, rapid project recovery and rescue as well as custom development to meet any business need. If you would like more information on NetSuite or are in need of consultation for your project or implementation, feel free to contact NetSuite support.
To Contact Us ClickHere