

INTRODUCTION
Understanding the various pricing options in NetSuite can be very important for any company. There are a variety of pricing options that can be used in NetSuite, such as price levels and quantity pricing. These features can help minimize the risk of human error and ensure that your company’s pricing is set on the terms that are most appropriate for your business.
In today’s blog, we explore the Multiple Pricing feature that allows you to set different prices for different products on a sales order, which has a limit of 1,000. This feature allows more flexibility in pricing for your customers. For instance, if you want customer discounts that are not willing to pay full price for your products multiple prices for different products can be set offering discounts ranging from 5% to 15%.
PROCESS
To Enable Multiple Pricing:
Navigate to Setup > Company > Setup Tasks > Enable Features. (Administrator Role)

Click the Transactions subtab.

Scroll down to the Sales section and check the Multiple Prices box.

Scroll down to the bottom of the page and click Save.

To Create a New Price Level:
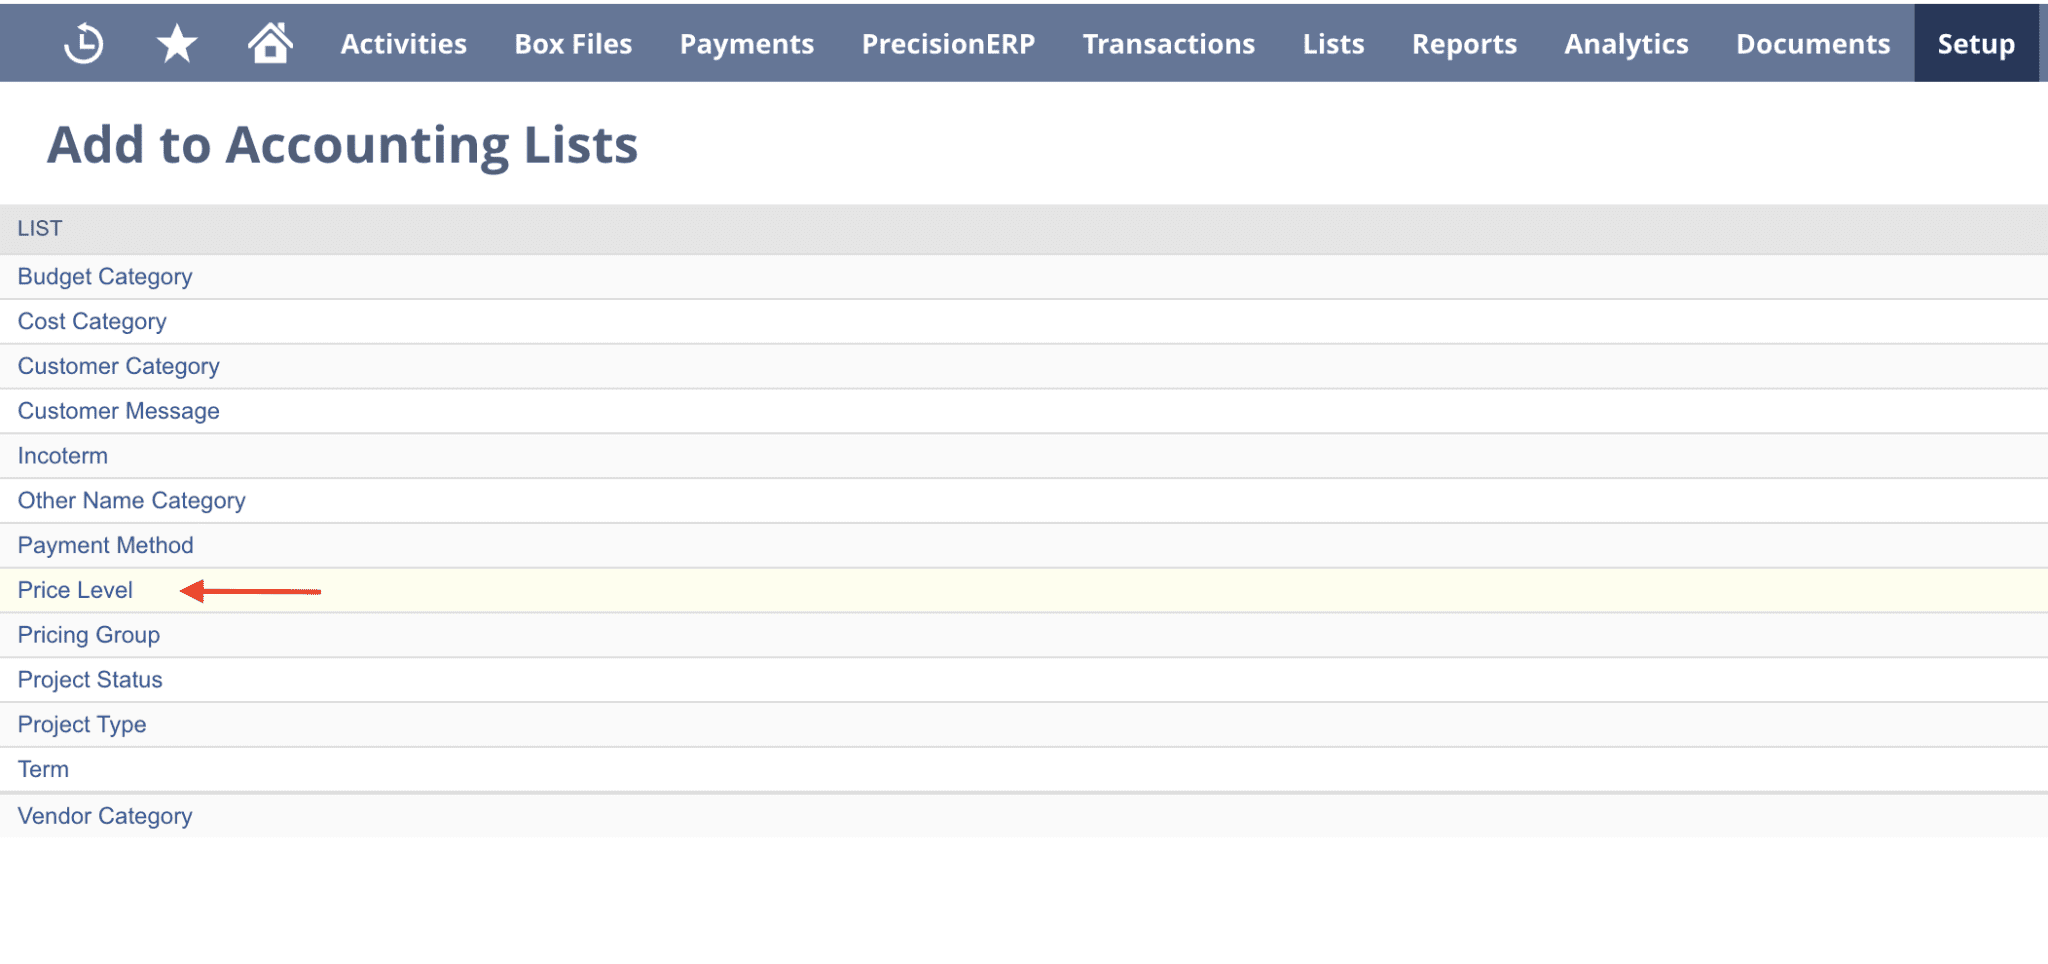
Navigate to Setup > Accounting > Setup Tasks > Accounting Lists > New.
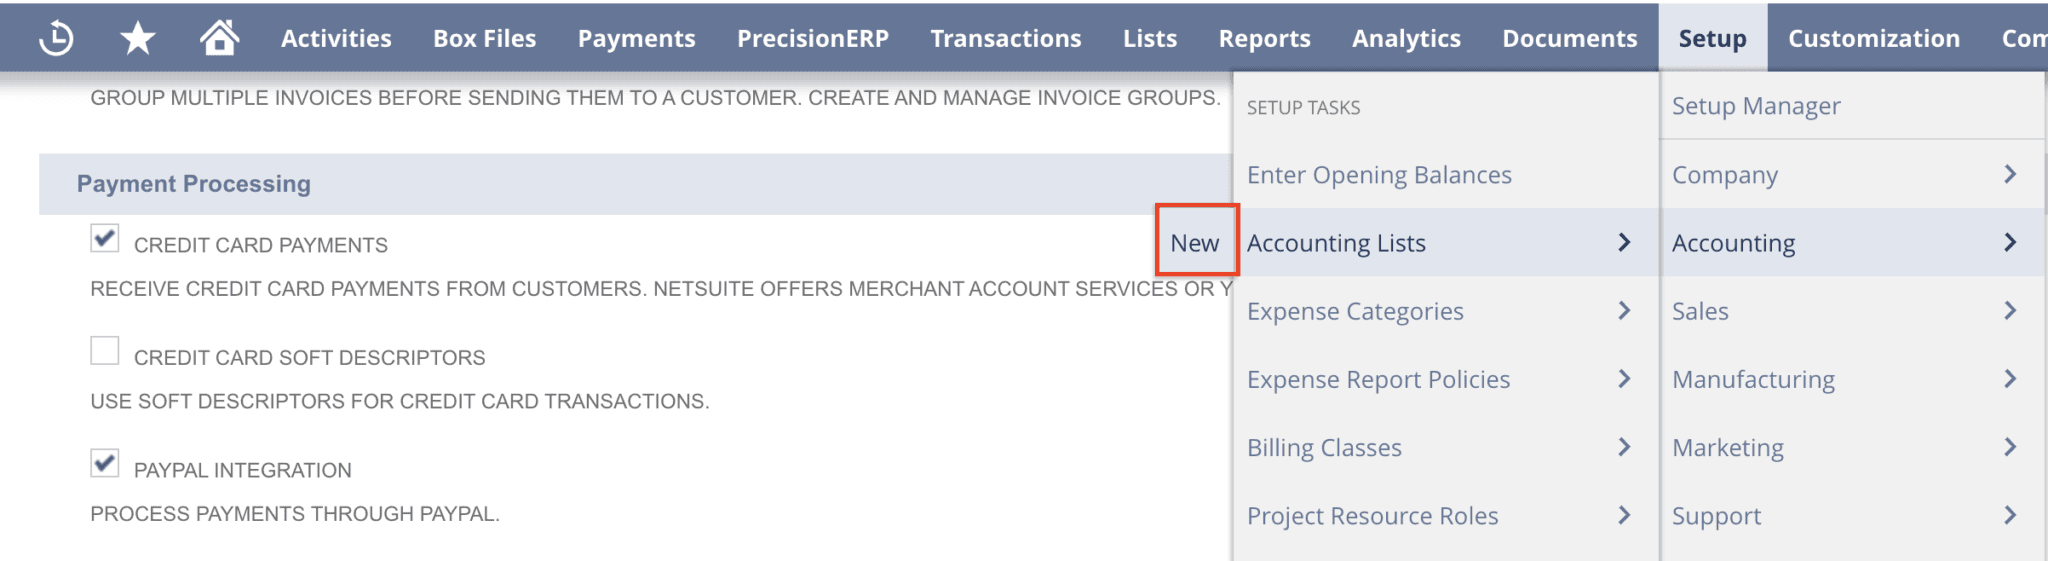
Select the Price Level.
On the Price Level page, enter a name in the Price Level field (this name should describe the price level you are creating). In the Markup/Discount % field, optionally enter a positive or negative percentage to mark up or discount prices for this price level. Pricing is calculated by applying the positive or negative percentage to the Base Price level.
Note: Any value you enter is rounded to the nearest 0.01%.
To update all items using this price level, check the Update Existing Prices box. When you create a new item record that uses this price level, the item price automatically updates.
Select the Online Price Level box for this price level to be your online price level.
If required, select the Inactive box to inactivate the Price Level record.
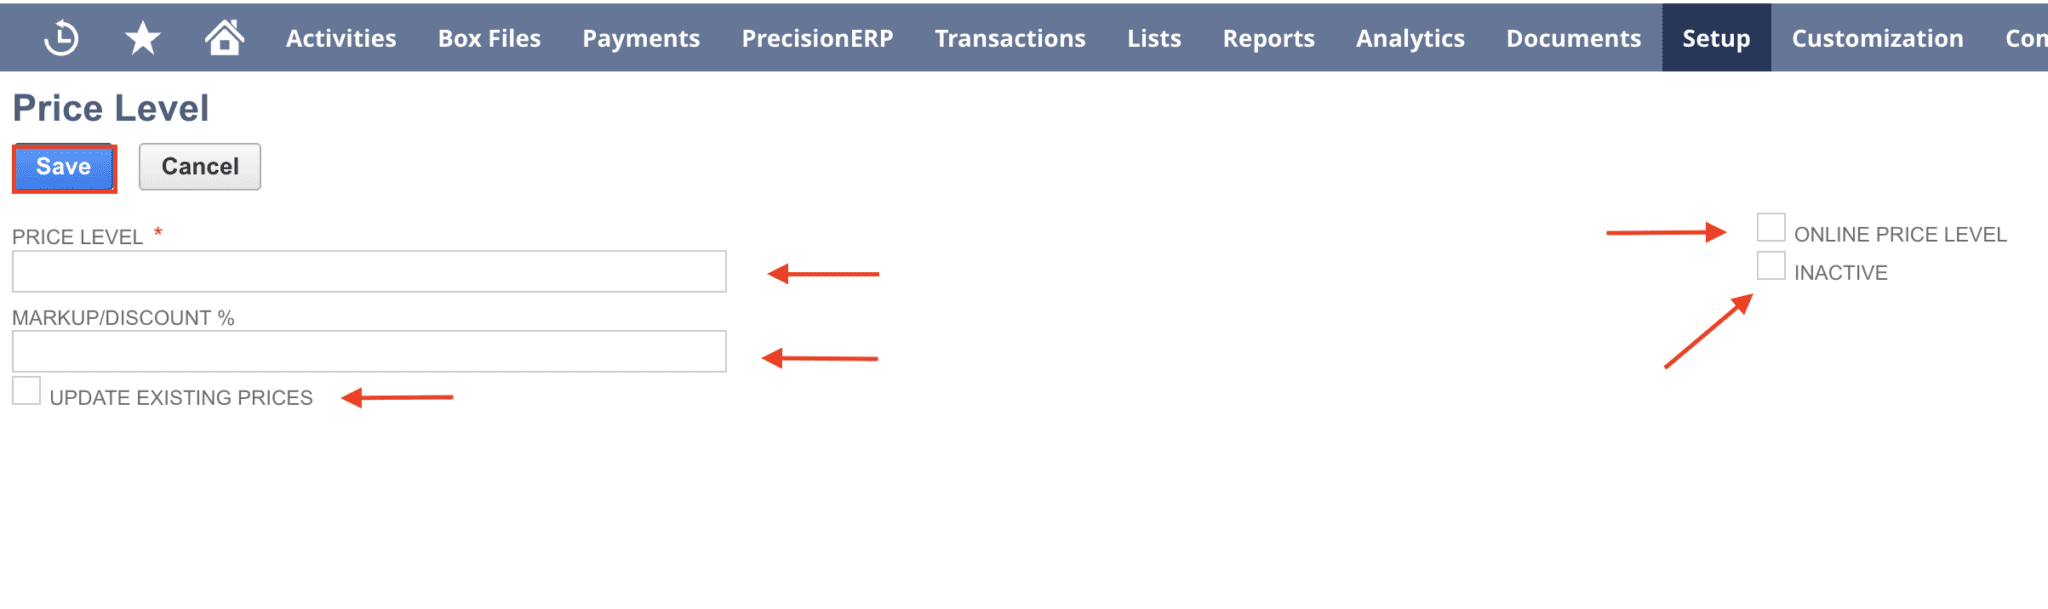
Note: After a record is marked inactive, it no longer appears in NetSuite lists and popup windows. You can still see inactive records on list pages by checking the Show All box. Clear the Inactive box if you want this price level to appear in lists.
NetSuite Tip: To improve performance, you should inactivate price levels you are not currently using.
Click Save.
After creating price levels, enter prices for the respective price levels on item records.
Navigate to Lists > Accounting > Items. For each item that a price level applies the designated price needs to be entered on the Sales/Pricing sublist. The item price level records can also be bulk updated using the CSV import tool. Once complete users can select the appropriate price levels when creating invoices.

CONCLUSION
Having the ability to apply pricing options in NetSuite can ensure that your prices are always accurate for your customers. We hope this post helped you understand the Price Level feature in NetSuite and how it can help you improve your business.
About Us
We are a NetSuite Solutions Partner and reseller with 30+ years of combined experience. We specialize in implementation, optimization, integration, rapid project recovery and rescue as well as custom development to meet any business need. If you would like more information on NetSuite or are in need of consultation for your project or implementation, feel free to contact us.
To Contact Us ClickHere