Introduction:
When using NetSuite, there are many ways to solve pain points and/or enhance a current environment. One use case that has many ways to solve is how to notify an employee about a transaction associated with them. This can be done on the dashboard using portlets or NetSuite, which can be configured to automatically send emails, allowing the employee to utilize the dashboard for other purposes. This post will outline the steps to set up a version of one type of solution to email an employee automatically based on certain conditions. Additionally, implementing a NetSuite journal entry approval workflow can streamline financial processes and ensure compliance with company policies.

Overview:
For this post, the Sales Representative role will be the email receiver, and the transaction subtype will be an invoice. First, navigate to the New Workflow option from the center, as shown above. This will open a menu where the essential characteristics of the workflow are provided. The required data includes the name of the workflow, and because the record type is Transaction, a subtype of Invoice needs to be selected. Other sections that are important during this step are listed under the Event Definition heading. Trigger types, event types, contexts, and conditions are the building blocks for any workflow.
Required Information:
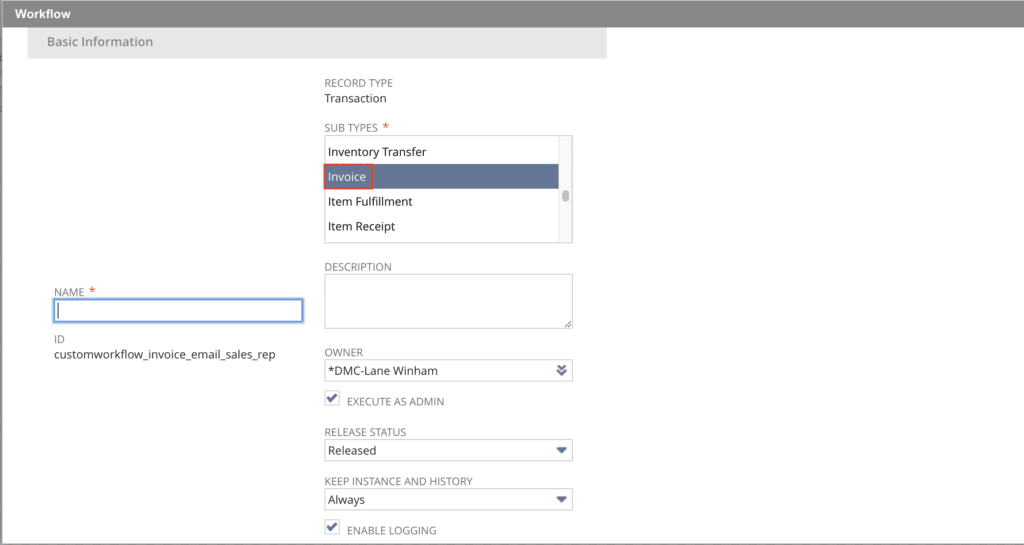
Event Definition:

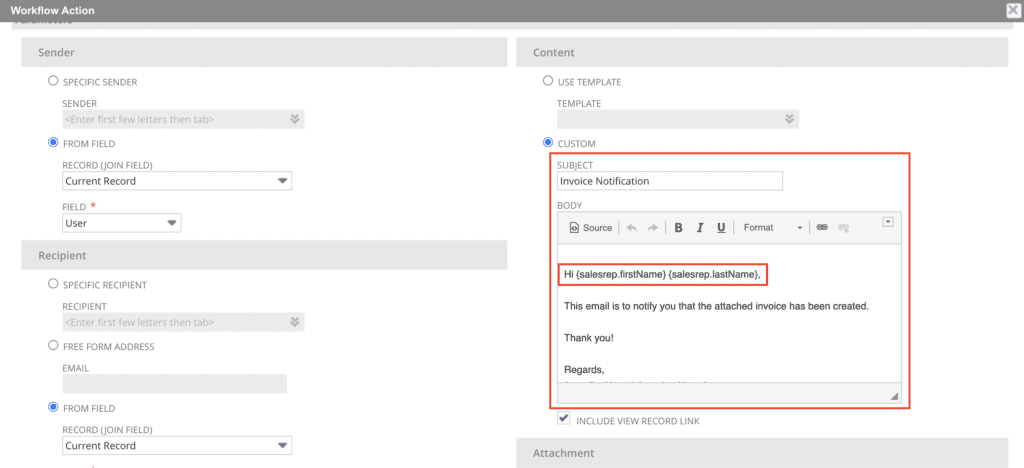
Once the basic information about the workflow has been provided, then an action must be configured to initiate the sending of the email to a Sales Representative. First, click on the State 1 box, then click on the new action in the bottom right corner of the form. On the following page, select Send Email as the action type. After the action type is selected, an action menu will pop up where information about the specific activity can be provided. The condition can be any number of custom logic statements where all must be true for the action to initiate. For example, validating that the Sales Representative field on the form is not blank. Other key information that can be captured on this form is the email template, which provides both a subject and body the email will utilize. Within this template, data can be pulled from the invoice form using curly brackets, as seen in the image below.
Action Type:
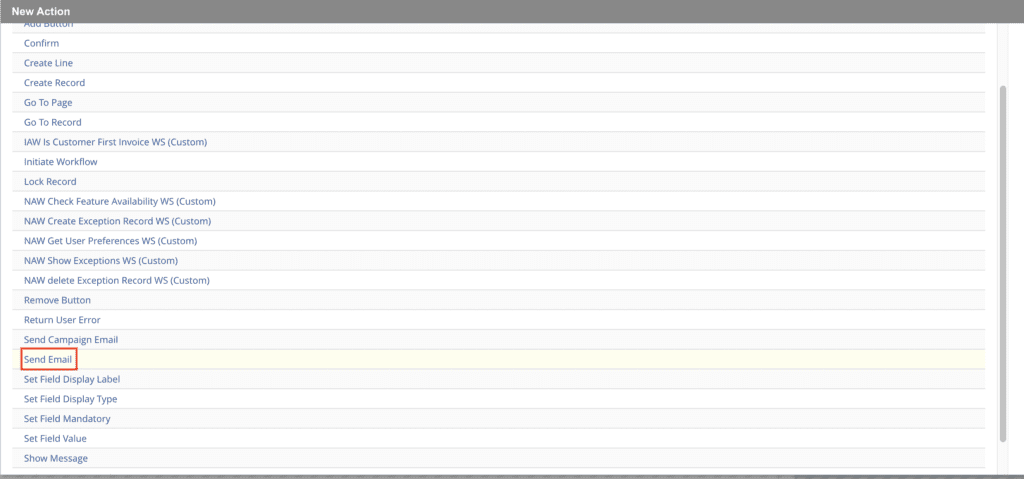
Action Characteristics:

Email Template:
Now that the action and workflow are configured, it is time to test. While in sandbox emails are not actually sent out, which creates a challenge when testing. There are a few ways to check to see if everything is working correctly. First, look at the log that was enabled while setting up the action. This can provide valuable information about the actual firing of the action. Second, looking at the communication tab of the transaction will show what messages or email would have been sent. The communication tab is also a great place to check the message preview to assure the message and data are correct, especially if data is being sourced from the form to populate in the email.
Log output:

Email Preview:

Conclusion:
This was a very simple example of how to configure automatic notifications, but it also demonstrates that even in the simplest of configurations, this functionality can be highly useful. This type of workflow can easily be built upon to create more advanced solutions and can be utilized for any type of transaction. For more detailed instructions and customization options, consult the NetSuite Customization Guide.
About Us
We are a NetSuite Solutions Partner and reseller with 30+ years of combined experience. We specialize in implementation, NetSuite Optimization, integration, rapid project recovery and rescue as well as custom development to meet any business need. If you would like more information on NetSuite or are in need of consultation for your project or implementation, feel free to contact us.
To Contact Us ClickHere
