INTRODUCTION
In NetSuite tools, Landed cost is the sum of expenses associated with shipping a product. Typically, this accounting term refers to accumulating international shipping costs, taxes, and fees. Think of it as the total amount of money it costs to get a vendor’s item produced overseas, transported, and received to your destination. This includes not only shipping and raw materials, but any additional fees such as import duties, shipping insurance, and other related costs. These costs contribute to the cost of goods sold and affect inventory valuation.
To help you better understand landed cost, here are some of the things that the landed cost of your product(s) may include:
- The original price of your product (incorporating any costs involved in manufacture)
- Transportation fees (both domestic and international, if applicable)
- Customs
- Duties/taxes
- Crating costs
- Handling costs
- Storage
- Tariffs
- Insurance
- Currency conversion (when applicable)
- Other overheads
- Payment processing
Although not an exhaustive list, Landed Cost is something you should be working on if you want to ensure your business remains profitable, especially with increasing offshore production needs.
Let’s look at a step-by-step process for setting up and managing Landed Costs in NetSuite.
PROCESS OVERVIEW
- Create Landed Cost Categories
- Setup > Accounting > Accounting Lists > New.
- Click Cost Category.
- Enter the name of the category.
- In the Cost Type field, select: Landed.
- Choose Expense Account.
- Click Save.

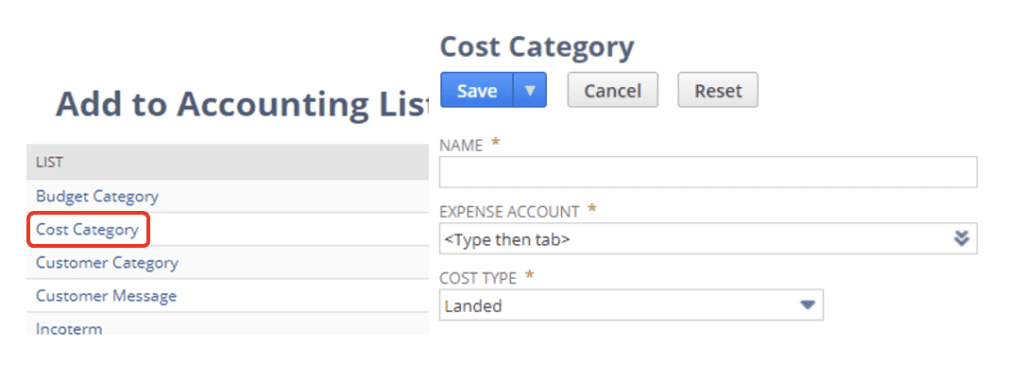
- Setup Inventory Item Record to track Landed Costs.
- Lists > Accounting > Items, choose item then Edit. Or Global Search item then Edit.
- Purchasing/Inventory sub tab, mark the Track Landed Cost checkbox.
- Click Save.


- Create Landed Cost Item Records to track separate costs.
- Lists > Accounting > Items > New.
- Choose an item, for example, Other Charge for Purchase.
- On the Accounting tab > choose the same expense account set on the landed cost category created.
- Enter necessary information then Save.
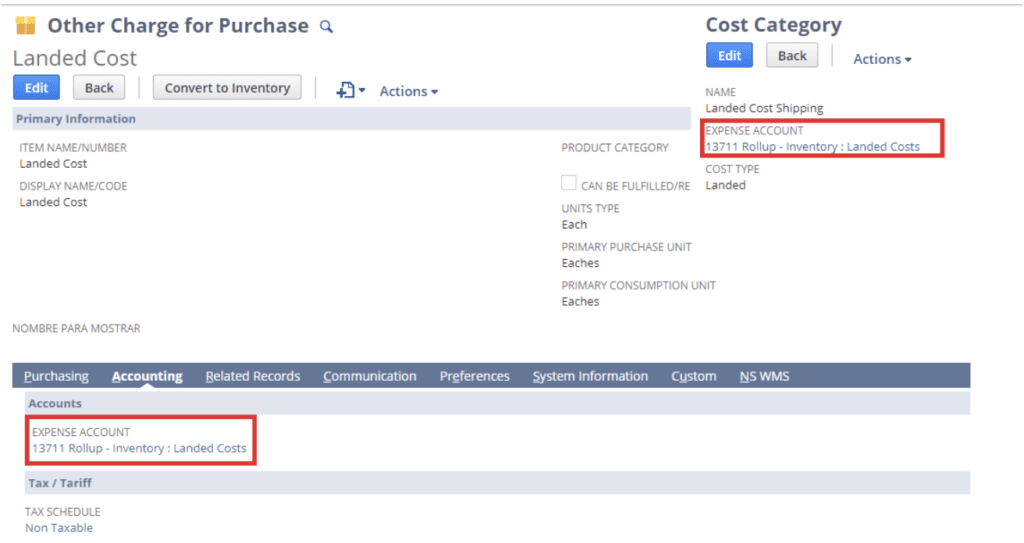
- Enter Landed Cost Transactions.
- Create a stand-alone bill for the freight.
- Enter Purchase Order for the item that track landed cost then receive.
- Associate landed cost to the item receipt. (Source: Other Transaction).
- Also try another PO, then receive. On the Item Receipt, set Source as Manual.


Source:
- Manual – If chosen, you will have the option to put the cost manually in the allocated field.
- Other Transaction – If chosen, cost will be based on the total Amount of the Other Charge Item on the chosen Bill.
- Other Transaction (exclude tax) – cost will be based on the Bill excluding tax.
COST ALLOCATION

***Eligible items are the items with the Track Landed Cost box checked on their record. If you have faced any issue, or have query, feel free to connect with NetSuite experts.
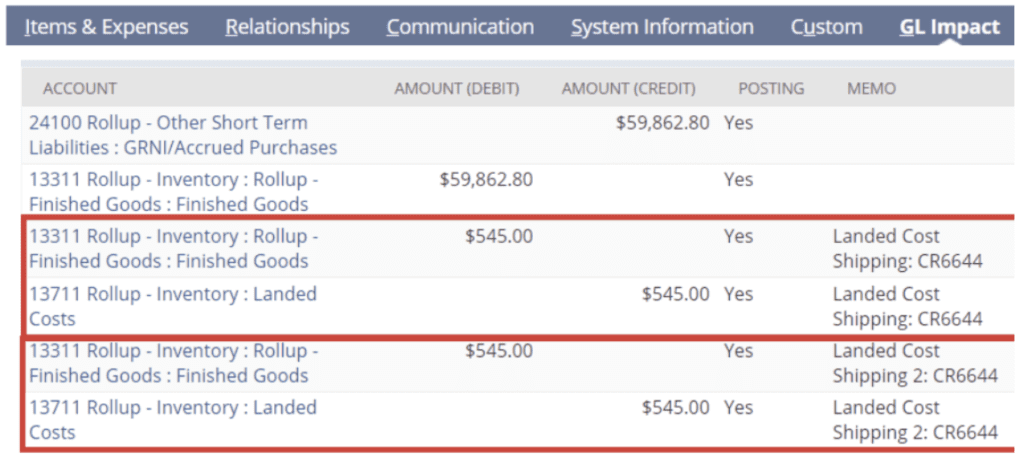
You can create as many Landed Cost Categories as possible and use the same account to impact:

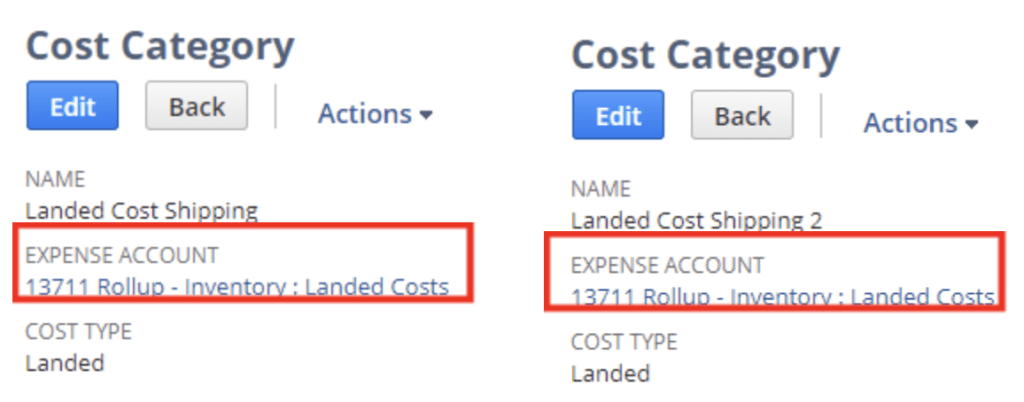
Select in your bill the landed cost category:


And you can add it to your Item Receipt:
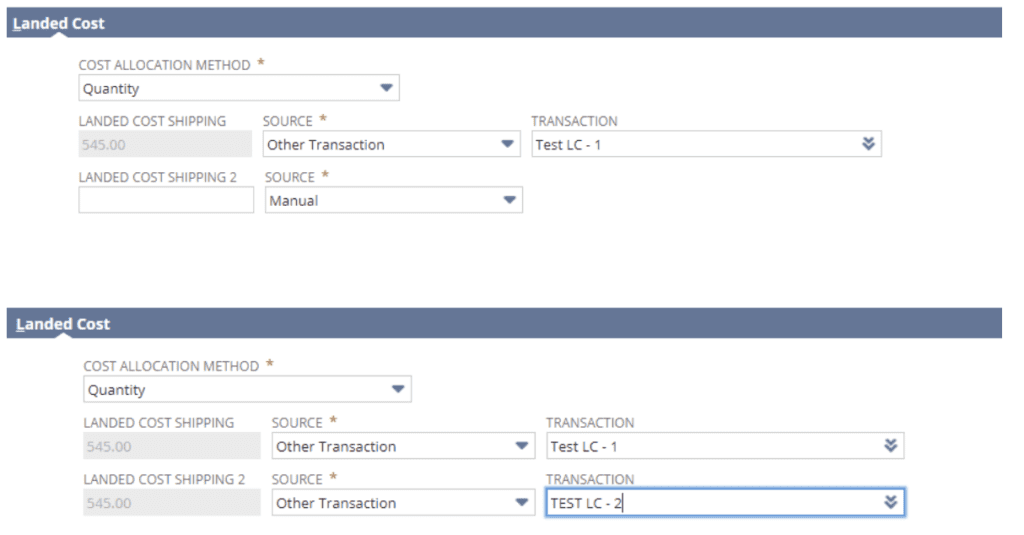
Causing the same GL Impact.
CONCLUSION
Commerce is complex, and with online marketplaces cutting margins in our global economy it is critical to clearly understand landed costs and how they impact your bottom line. There is a lot to calculate for each shipment, and freight costs are dynamic, so you need good data capture.
If you have some specific questions about understanding and calculating landed costs, contact our NetSuite support and tell us a little more about your situation and products.


